
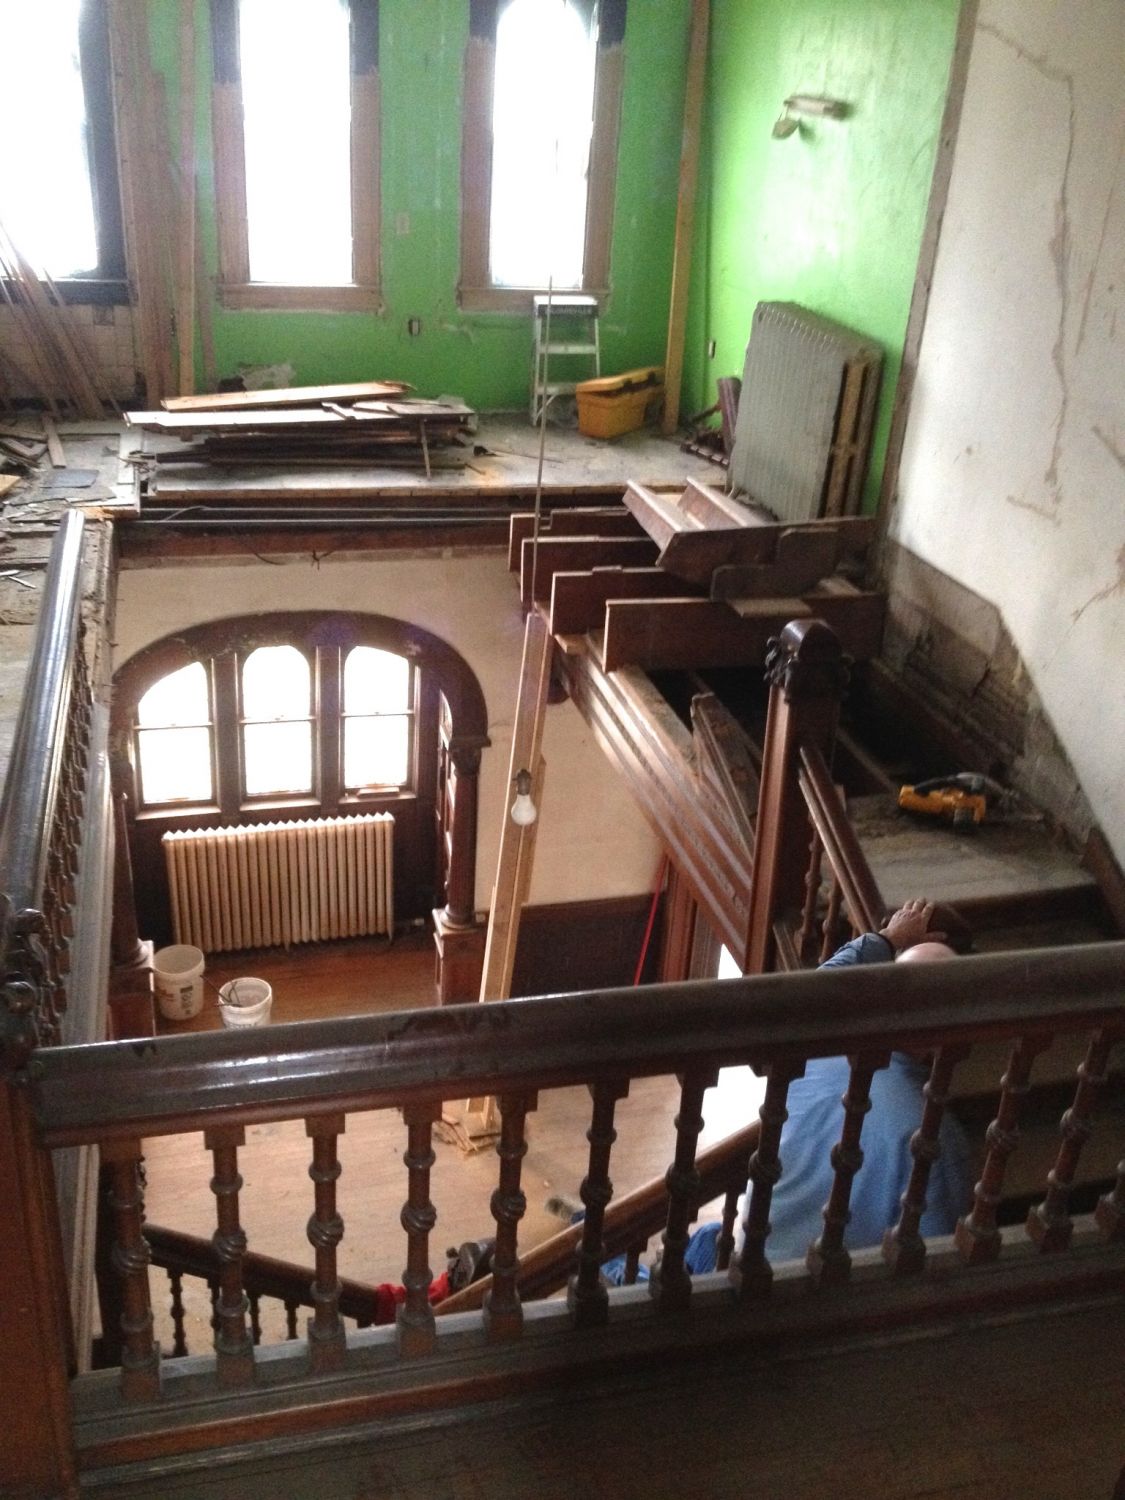
The Grand Stair. Golly.

Today, I removed the north balustrade (left, and which had just tacked into position by me several years ago) and reset it properly both up/down and left/right. That took some figuring out. I mean, EXACTLY where had it been placed in 1894?

I also reinstalled the lower-most horizontal trim board (the lighter one). Then I pondered this NW corner. What was missing under the newel post? And I pondered some more. Then…oh!

I realized that I had an exact copy of what the NW corner originally looked like…over in the SW corner. So, what you see above…
…is exactly how this would have looked in 1894.
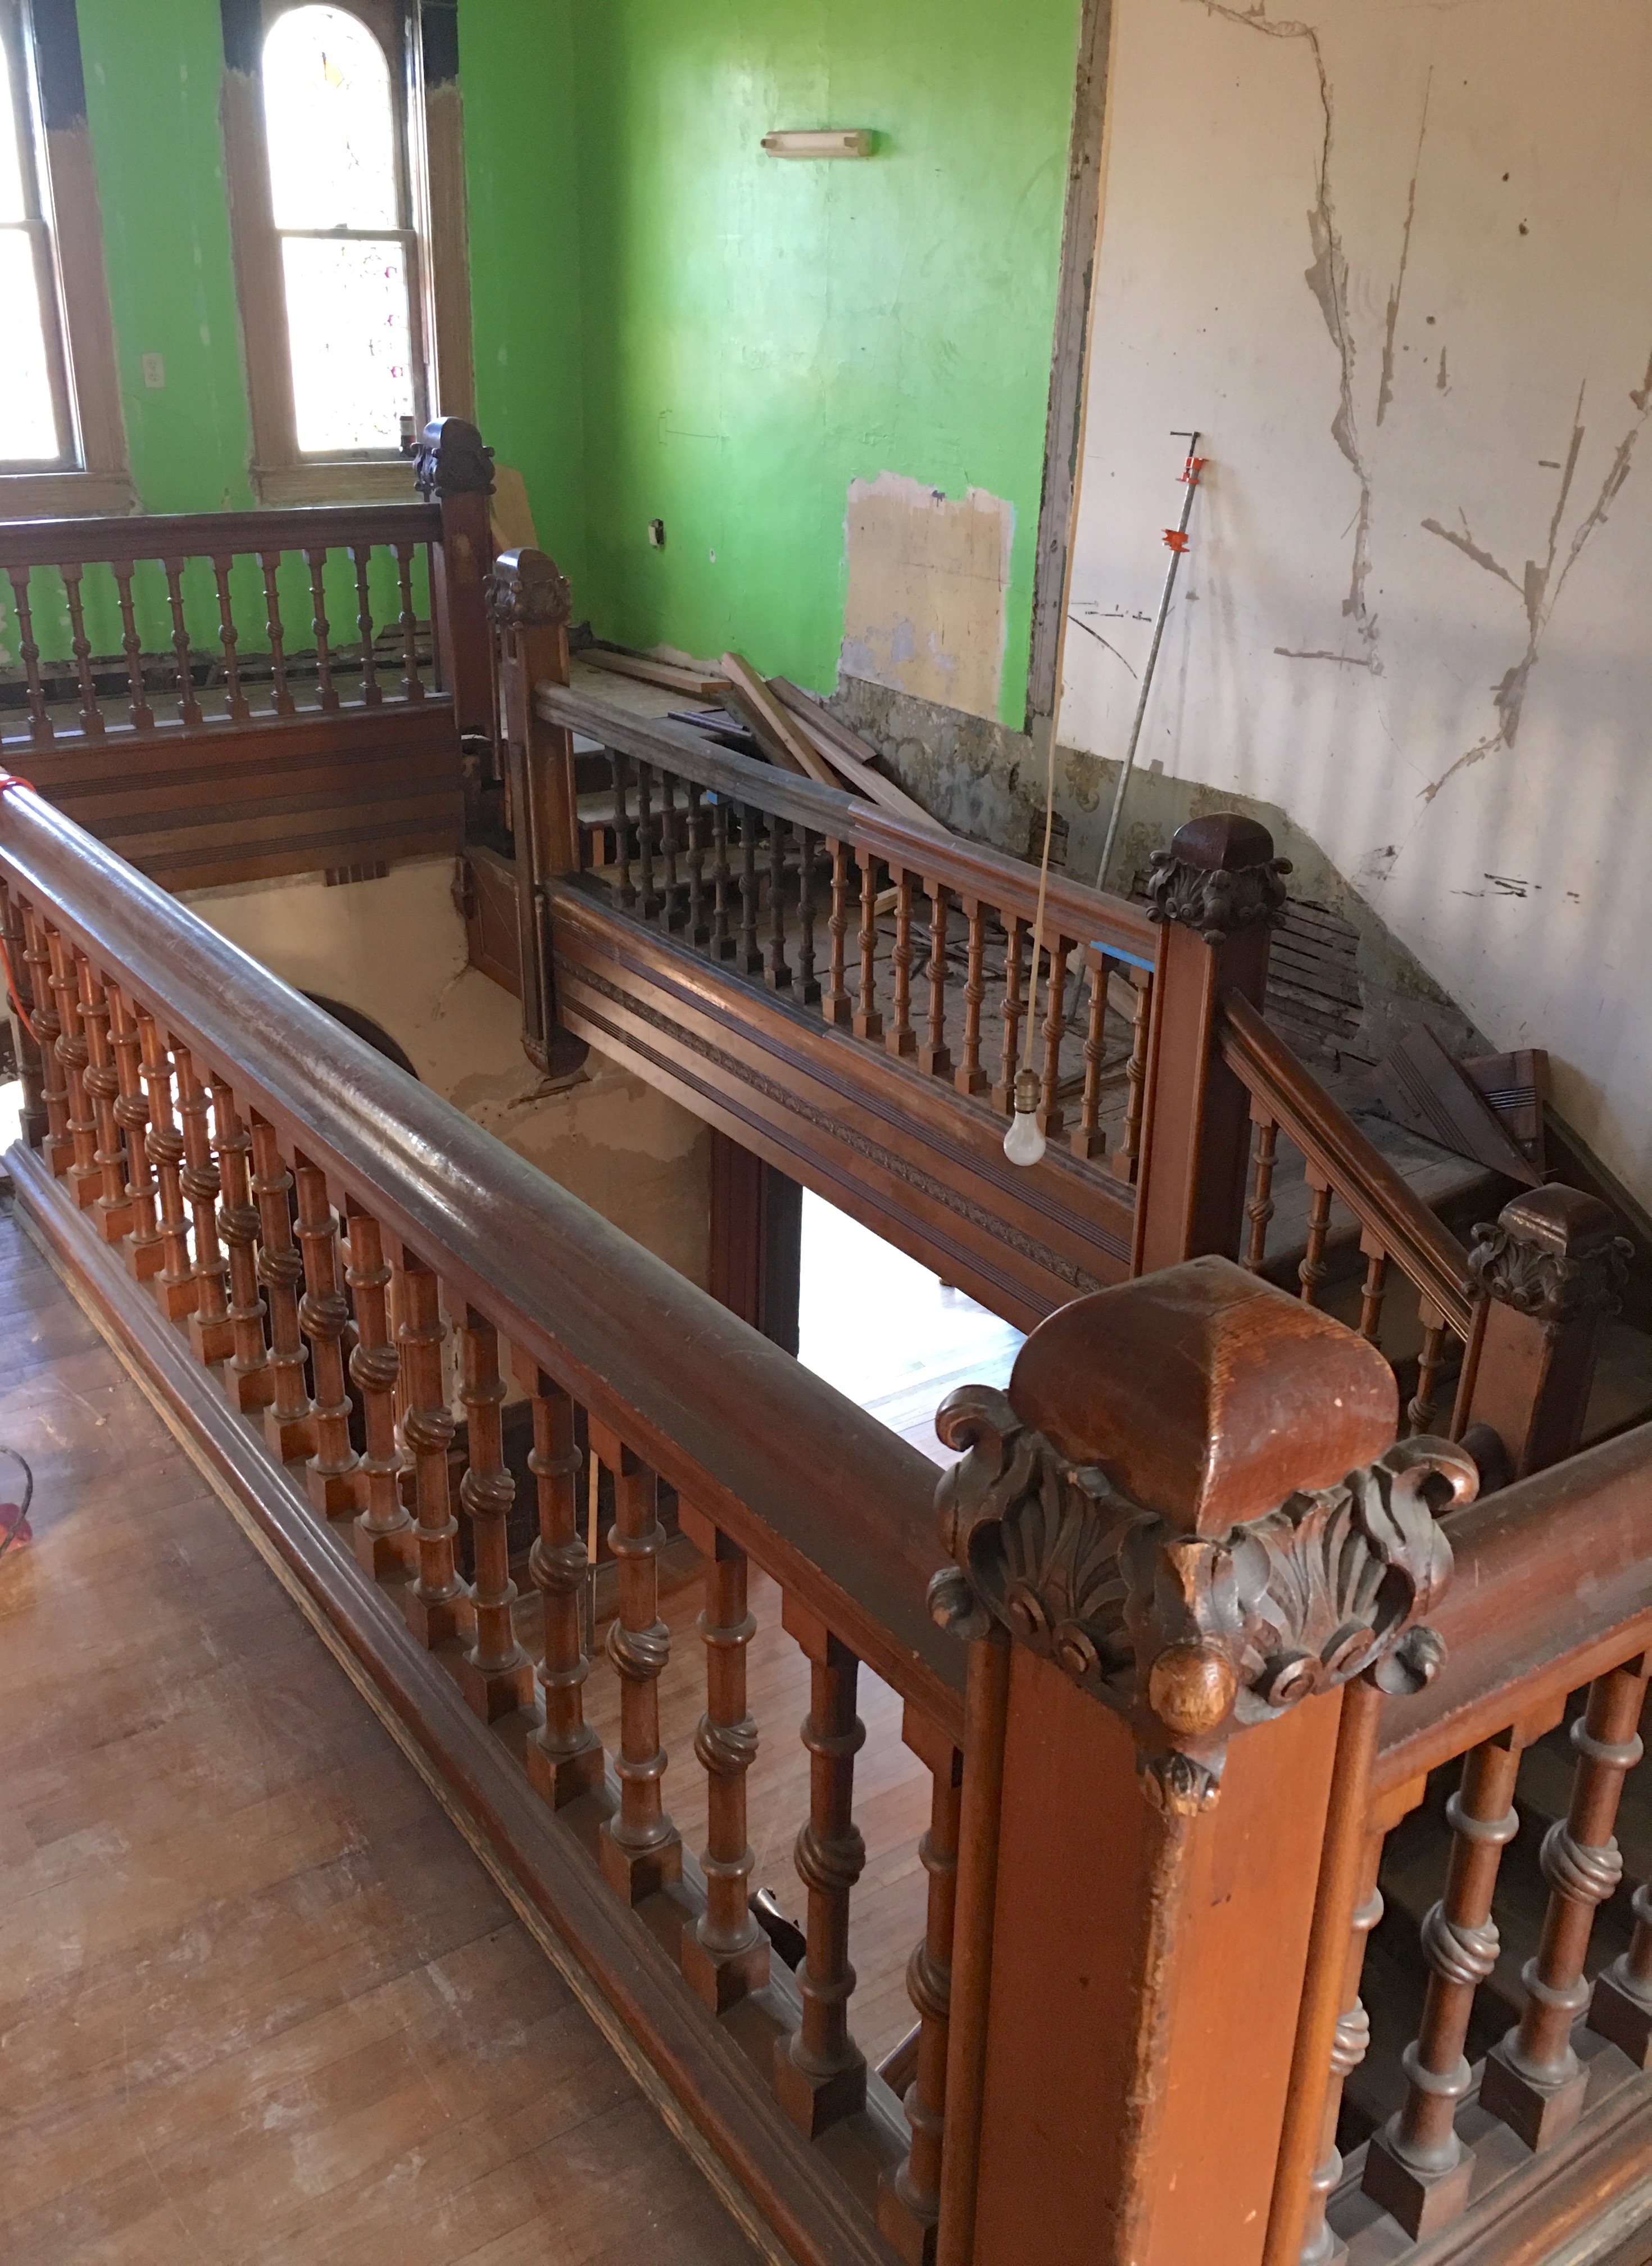
But…see how the SW newel post extends UNDER the stair. There is a…

…flourish!

These flourishes are all over the grand stair.

Even a baby flourish in the NE corner (currently disconnected from the newel above).

There was however no indication that a flourish was ever in the NW corner. But there had to have been one. It just made sense. Then I thought: is there a ghost imprint under the wallpaper? Oh! I got VERY excited!

Golly! There was! There was!

Breathless with excitement, I pulled the flourish off from the SW corner and stuck it in the NW corner! And you can see the baby flourish over to the right. Along with a full flourish on the far right. Flourishes everywhere!

Squee!!!!!!!!

Although it looks like a lot is missing between the flourish and the newel proper, what is mostly missing is this rounder corner, which I can replicate. Again, like…
…this.
The grand stair, 2014.
The grand stair, 2018. It is now very close to how it looked in 1894. Well, if you ignore the radioactive green. And the missing balustrade artfully cropped out to the left.
A week ago, reconstructing the staircase seemed overwhelming. This is why I ignored it for four years.
But, after playing with it for several days, its mysteries have been revealed and I understand how it was put together, and how much of X Y Z pieces I need to have made. The whole thing now makes sense.
I am just bursting with excitement.
And a new half-flourish can be created by making a mold of the extant one and casting a new one.
Had I invited a skilled craftsperson to just deal with the whole stair, I would have been billed, likely, $30,000 to reconstruct the stair. But I expect to spend maybe $2,000 in having components milled.
So, yippee!

28 Comments
Leave a Comment
Your email address will NEVER be made public or shared, and you may use a screen name if you wish.
The details such as flourishes are delicious!! The stair will be majestic once again as in 1894!!!!
The staircase looks great so far! What kind of light fixture do you want to eventually install?
I too, am curious. I envision a fixture as grand as the staircase, myself. Something like this.
Although this example is sold, I still figured you’d appreciate it, Ross. Anthemion!
FABULOUS, Cody!
But the Cross House cost $18K when built. The chandelier you link to was intended for a much grander house, more in the $60K price range.
I try to keep this in mind when shopping for the house. I shy away from stuff that is too modest, or too grand. Something more in the middle.
So do you consider the dining room chandelier to be somewhere in the middle? It is absolutely fabulous in the space, but probably considerably more than the original.
The crystal chandelier was not really expensive. It is not old and was likely made in China. It is not high lead crystal.
So, to me, it seems to fit my not too modest or too grand thought process.
And such a room can certainly handle the bling!
But Ross the entry & stairway are immense & grand in scale— won’t a fixture of that size & detail fit? Aside from the $$$$ grandeur.
I have a two storey entrance hall in my 1892 Victorian. It is the largest “space” in the house. We would have loved to put a large chandelier in the hall. Alas, practicality won out. We have put a large wooden ceiling fan in instead. It circulates warm air down into hall and keeps the main part of the house liveable in the frigid Maine winters.
Oh yipe indeed. I am so glad you’re making progress on the grand staircase it’s such a special element in Cross House. It is going to look amazing.
What progress on my favorite part of the house! It’s really looking terrific Ross.
Great puzzle-work Ross! Your resurrecting staircase will shine glorious once again!
The stair is grand, indeed, and I’m thrilled that it’s been restored to its original size. Yet, I’m still amazed that it was designed to be so enormous! I don’t think I’ve ever seen a staircase prompting such a long, circuitous path to reach most of the upstairs rooms. Clearly designed to celebrate form over function–not that there’s anything wrong with that, of course. More opportunities for flourishes!
Agreed, Brian. The grand stair is absurd. Deliciously so however! As a result, I actually don’t use it much. I default to the servant’s stair which is SO much more direct.
I really love the design. I’ve seen a lot of houses which remind me of a hotel with a long hall and many doors on each side. I’ve always loved curved staircases, but this seems really unique. Of course, I’m no expert and maybe this design was more common than I realize. Anyway, great detective work Ross! It’s gong to be beautiful.
Ross,
I started writing the following, thinking that it is straightforward and quite doable for anyone. As I wrote, and the time it took, made me realize that this may not be the type of project that you will want to take on. I almost decided not to post it. I decided that I will post it because it may be useful to one of your followers even if you don’t use it. It may also be of use to you in communicating to whoever you hire to do the job a way to join rail pieces without using nails or other hardware that can damage the wood or be visible. So here goes…
If you are joining two cut sections of rail, and want structural strength, I have an idea. You can build a plywood sided box with a regular 2x? bottom. Measure the widest part of the rail. Rip cut a piece of lumber that is one dimension wider than the rail. Call this piece your box jig bottom. If the rail is 3 1/2″ wide or less a standard 2×4 will do, if the width is between 3 1/2″ and 5 1/2″ then 2×6 lumber will do, etc. The 1/2″ plywood sides should be cut the height of the rail plus a little more than the thickness of the bottom. Call these the box jig sides. Make sure that all pieces of the box are as square as possible. The lumber for the bottom should be chosen for being both straight and with no twist to it. This box needs to be longer than 1/2 of the sum of the two pieces of rail being joined. Mark the center of the bottom. This is where the two pieces will join.
To assemble the box, clamp the plywood sides in place to the bottom, It is easiest to assemble this on a flat planar surface. The surface itself does not need to be level. Once all is lined up, screw the plywood into the bottom. The clamps are to make sure it does not shift. I prefer to use a drill or impact driver with the appropriate bit for the screws used. It would be a good idea to pre-drill the screw holes with a drill bit that is slightly smaller than the width of the screw shaft because if a screw splits the bottom, you are losing your square surfaces. You can then remove the clamps.
To join the rail sections together, place scraps of 2×4 under the box so that you have a 1 2/” gap beneath it, and place the sections of rail up side down in the box. The ends that you will be mating should meet in the center of the box. Trim the ends so they mate as well as possible in the box. A square cut will be the most visible mating. Angled cuts do not catch the eye as much. The box is the width of the widest part of the rail. in order to make sure that the two pieces you are joining don’t shift, place shims between the box sides and the rail sections at numerous points. Slip a clamp under the box and clamp the rail sections in place at these shimmed points so the rail can’t shift. Make sure that both pieces of rail are fitted snugly to each other because any gap will be clearly visible in the final joined rail.
The two sections of rail should now be clamped in place fitting snugly in the box with the ends snug too.
A plunge router will now be used to make a long mortise the length of the two sections of rail into which you will be gluing a continuous tenon of the same wood as the rail. A sled made out of plywood that is wider than the jig box with 2 straight pieces glued to it which will be snug to the box. The idea is to have something that will only slide along the length of the box jig with little or no motion from side to side. The surfaces on which the sled slides should be sanded and waxed so it will slide well. Secure a plunge router with a 3/4″ straight bit to the sled so that when the bit is lowered it hits inside the channel that the baluster ends and fillets go so that once the rail is reused the balusters and fillets will completely hide the repair. Also be sure that your cut will not end up emerging from the narrowest parts of the rail.The bit should also be long enough that it can go 2/3 of the way into the rail. The groove that you will be cutting will start off center, but once the first pass is done, the whole sled will be turned around to cut from the other side creating a perfectly symmetrical channel. To begin, the router should be set over the starting position with the bit slightly above the surface to be cut. The plunge stop should be set so that you can only make your cut 1/4″ deep. Turn on your router while holding it in a firm grip with both hands, plunge it the 1/4″, and run the router and sled the length of where you are putting your channel. When you have finished this first pass, turn the router off while keeping your grip firm and the router pressed down until the bit stop spinning completely. The router motor creates a lot of torque. Letting your two handed grip loosen during operation and particularly while the motor is starting and stopping, can lead to damage to the work and injury to the operator.
Repeat the same pass, moving the plunge stop so that each pass is 1/4″ deeper. Oak is a really hard wood, and although deeper passes are possible, they are likely to cause damage to the bit or burning to the wood. If that is occurring anyway, then you need to make even shallower passes. For this first part of the channel, the bit will be cutting on three sides at once. Continue making these passes until the channel is about 2/3 of the way down into the rail. You should repeat the last pass to assure that the channel is straight, clean, and clear of all chips and dust.
The next set of passes will be with the sled turned around to cut the other side. These passes will not be cutting wood on both sides because there should be the channel that you have made on the one side. You may make deeper passes without straining the motor or burning the wood. If you make the second pass deeper than the first by mistake, turn the sled around and make one more pass. This should give you an evenly deep square channel with a perfectly flat bottom. The final step is to mill a single piece of oak that will fit tightly in the channel that you can glue in place. It is always best to make this piece out of the same wood and cut as the rail so that natural expansion and contraction of the rail and the patch are the same.
Stewart!
You need to get your butt to the Cross House STAT and devote yourself to finishing the grand stair!
Devote! STAT!
OK…
…as soon as my two houses start restoring themselves.
If you had a complete wood shop on site as well as the correct lumber, it may even be partially doable. Without the tools on hand, the knowledge and ability isn’t as useful.
Drat!
Double drat from this end. It is amazing how many things there are which I would love to do, but just can’t figure out how to fit them onto my life. Instead I write long explanations about how I think they should be done hoping to be helpful.
Hi Ross,
Here I am again with another long speculative possibility for you.
I have continued to give your issues with the grand stair a lot of thought. I really do wish that I was able to come out there and do it myself, but I don’t think I could even do it well without access to my wood shop.
I think that the first thing that you need to do is to find a source for old quarter sawn oak such as old barn columns or beams. The thing about these beams is that, if they are wide enough, even if they were not originally quarter sawn, you could easily re-mill them so that the run of the tree rings is perpendicular to the newly milled surface which will expose the correct grain. Some quarter sawn grain is hidden in every oak board. I went over the other comments twice and for some reason I could not find the response by the fellow who mentioned a supply of old oak from barns that are being demolished or not restorable.
Another issue is the species of oak used in the bannisters. There are a lot of different species of oak and they each have their own appearance. Although I have never done it, I have heard that there are places to which you can send a splinter of wood, and the company will identify the species. White oak and red oak seem to be the most common from what I have seen. If you were to send a splinter from the original rail to be identified, you would then need to send a splinter of the barn beam as well to make sure that they are a match. I have never done a search to find such a place, so I have no reference for you.
As for your connecting two portions of rail with a bolt, or more likely all thread at the ends that have mortises for the nuts cut out of the bottom of the rail ends, you will need to cut the all thread so that, when you spin the two pieces together, they line up and are snug. The only way that I see to do that is to give it a try with what appears to be the right length of all thread. If they don’t align, I believe that you can grind one end of the all thread down until the threads start into the nut at the exact right place. This would be a trial and error project and I expect it will definitely feel like a trial. If the two pieces don’t end up pulling the ends very tightly together, I think that the rail will not be very strong at that joint. The principle is the same as that by which bed posts and rails were assembled, however they used bolts that were tightened by a socket or screwdriver from the outside of the post into the rail, which had the nut mortised in and plugged in place.
As for your pressed wood molding, I see two alternatives:
1) I believe that you could have a steel mold made of a section of the pattern. Then you could have a length of oak milled to the thickest dimensions, and with your mold in place, clamp it tightly to make your own. Move the mold over and repeat until the entire molding is made. A machinist would be able to advise you better on how you could do this.
2) With the newer computer and laser technologies, it may be possible to actually carve it rather than pressing it. The trick is to find someone who does know the technology and what equipment’s out there to do the job.
I bet someone who follows your blog either knows about the right new tech equipment or has a friend who does. It doesn’t hurt to ask once you know what to ask for.
Your staircase is glorious. Simply beautiful. In an age when flippers are pulling off and replacing original newels and balusters with metal rails (of all things) it is an inspiration to see your 19th century staircase reinstated with care, love and patience. It is a gift to all of us.
Will you be restoring that beautiful lamp on the pistachio wall?
Sue!!!!!!!!
Oh yes, that light IS a thing a potential beauty!
This is just amazing…that many of the original bits and pieces of the staircase survived all this time so that it could be restored with so much of the original wood AND more importantly that you are actually doing it! I can imagine everytime you walk through the foyer and look up you will smile.
I have been smiling a lot, Chris!
Another “Super Sleuth” moment. There should be a prize for this . . Like a new car or trip to Australia. You’re definitely a grand prize winner for solving the secret staircase mystery. Well done!
Yippee!! Flourishes abound! Do you have a recent tour available?
Your staircase is absolutely amazing!