
Discovery #1!!!!!!!!
OK!
Let the games begin!
This is the first of a series of Discovery posts, and all based on the Bo Adventure!
A while back I confirmed that the Cross House had picture rail throughout when built. This was, alas, and curiously, all long gone.
There was no question that I would reinstate such a feature as the rooms look denuded and not-quite-right without it.
The Bo visit though rather upturned all my thoughts on the subject.

This is the original paper frieze in the upper star hall. It is 20-inches high, which Bo says was a standard height. Now, see the lower part…

…which looks like this? Right in the middle of the image is bare plaster. The frieze paper is above, and the wallpaper is below, with about 1/2-inch of bare plaster separating them. Huh? I mean, the picture rail was about 2-1/2-inches high, so there should be 2-1/2-inches of bare plaster between the upper and lower paper, right?
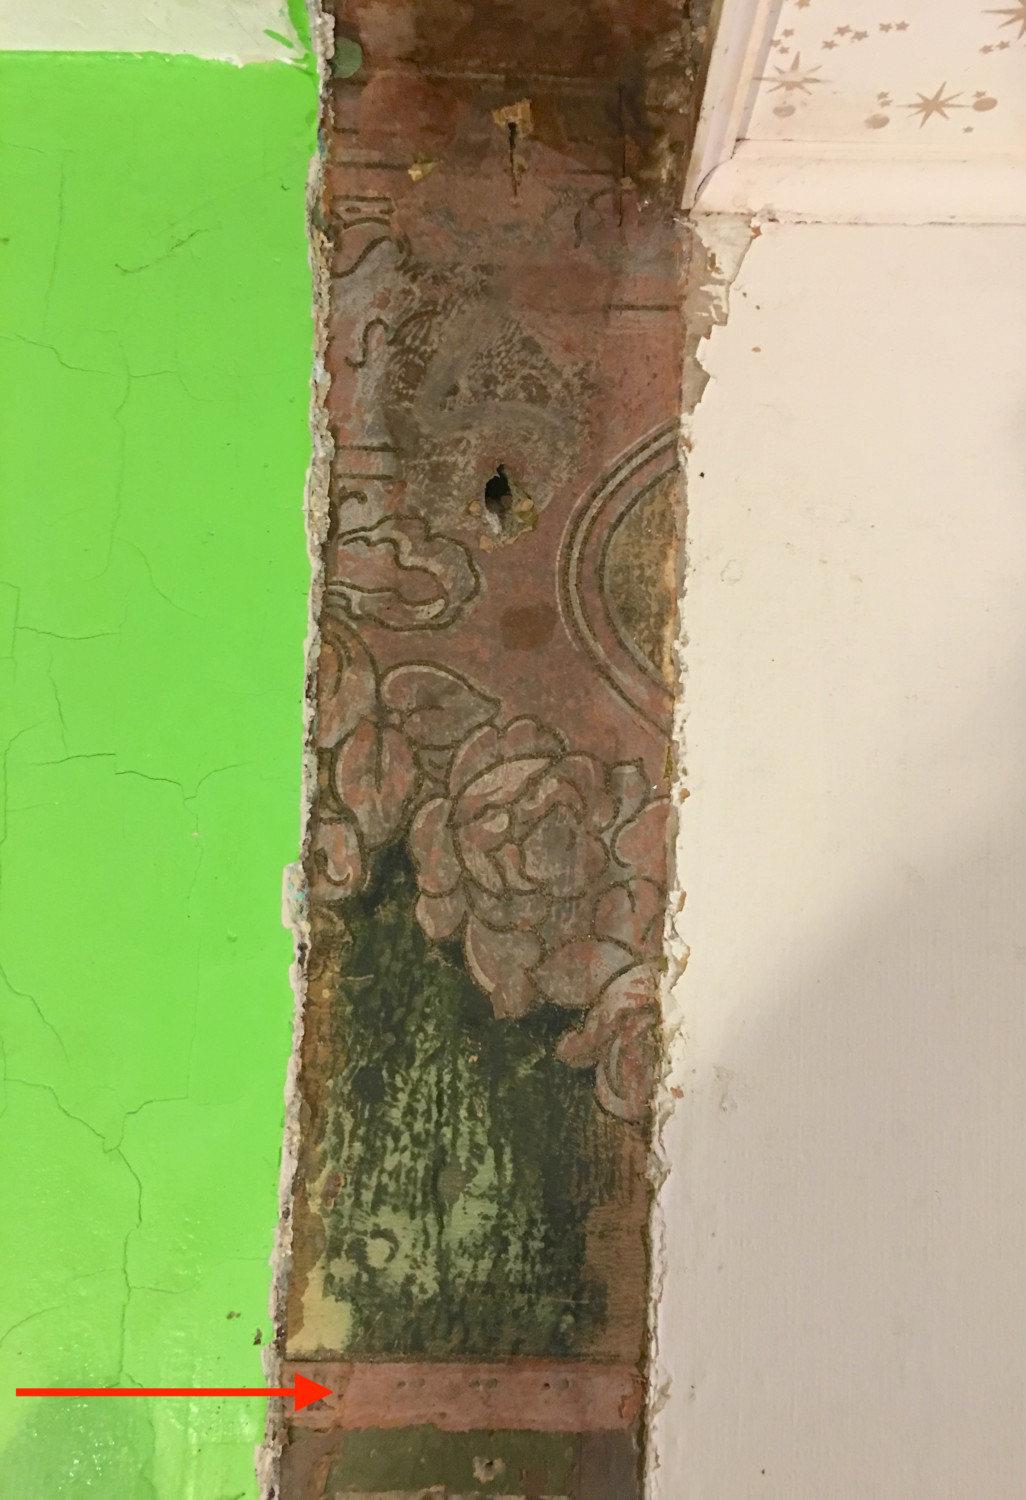
The hall was later re-papered. This is the SECOND frieze installed! A new discovery! But note, again, the thin line of bare plaster. Huh?
Bo pondered this curiosity and concluded that the answer really could only mean one thing: The picture rail was installed AFTER the papers were installed!
This had never occurred to me. I always assumed picture rail was installed simultaneously with all the other window trim, door trim, and base. Right?
Well…nope.
Because the second frieze also reveals the same 1/2-inch line of bare plaster this can only mean that when the second paper was installed all the picture rail was removed first, the papers hung, and then the picture railing was re-installed. Or perhaps new rail was installed.
And it seems reasonable to assume that this situation played out every time new paper was installed.
In 1950, it seems, all the papers in the house were removed to bare plaster when the house was converted into a motel, and new papers installed. These 1950 papers abound in the house but with a distinct oddity: no picture rail.
Presumably, when the 1950 re-papering commenced the typical situation of removing the picture rail was followed but with a twist. No picture rail was then re-installed.
Yep, the 1950 papers go uninterrupted from the base molding to the ceiling.
So this then is when, it seems, all the picture rail vanished in the house.
Was the discarded picture railing the 1894 railing, having been repeatedly installed and re-installed over the last six decades? Or was new railing normally installed with new paper?
I have no answers to these vexing questions.
(NOTE: The reason I have discovered bits of pre-1950 paper in the house is because these survivors were protected by radiators or walls added to the house and later removed.)
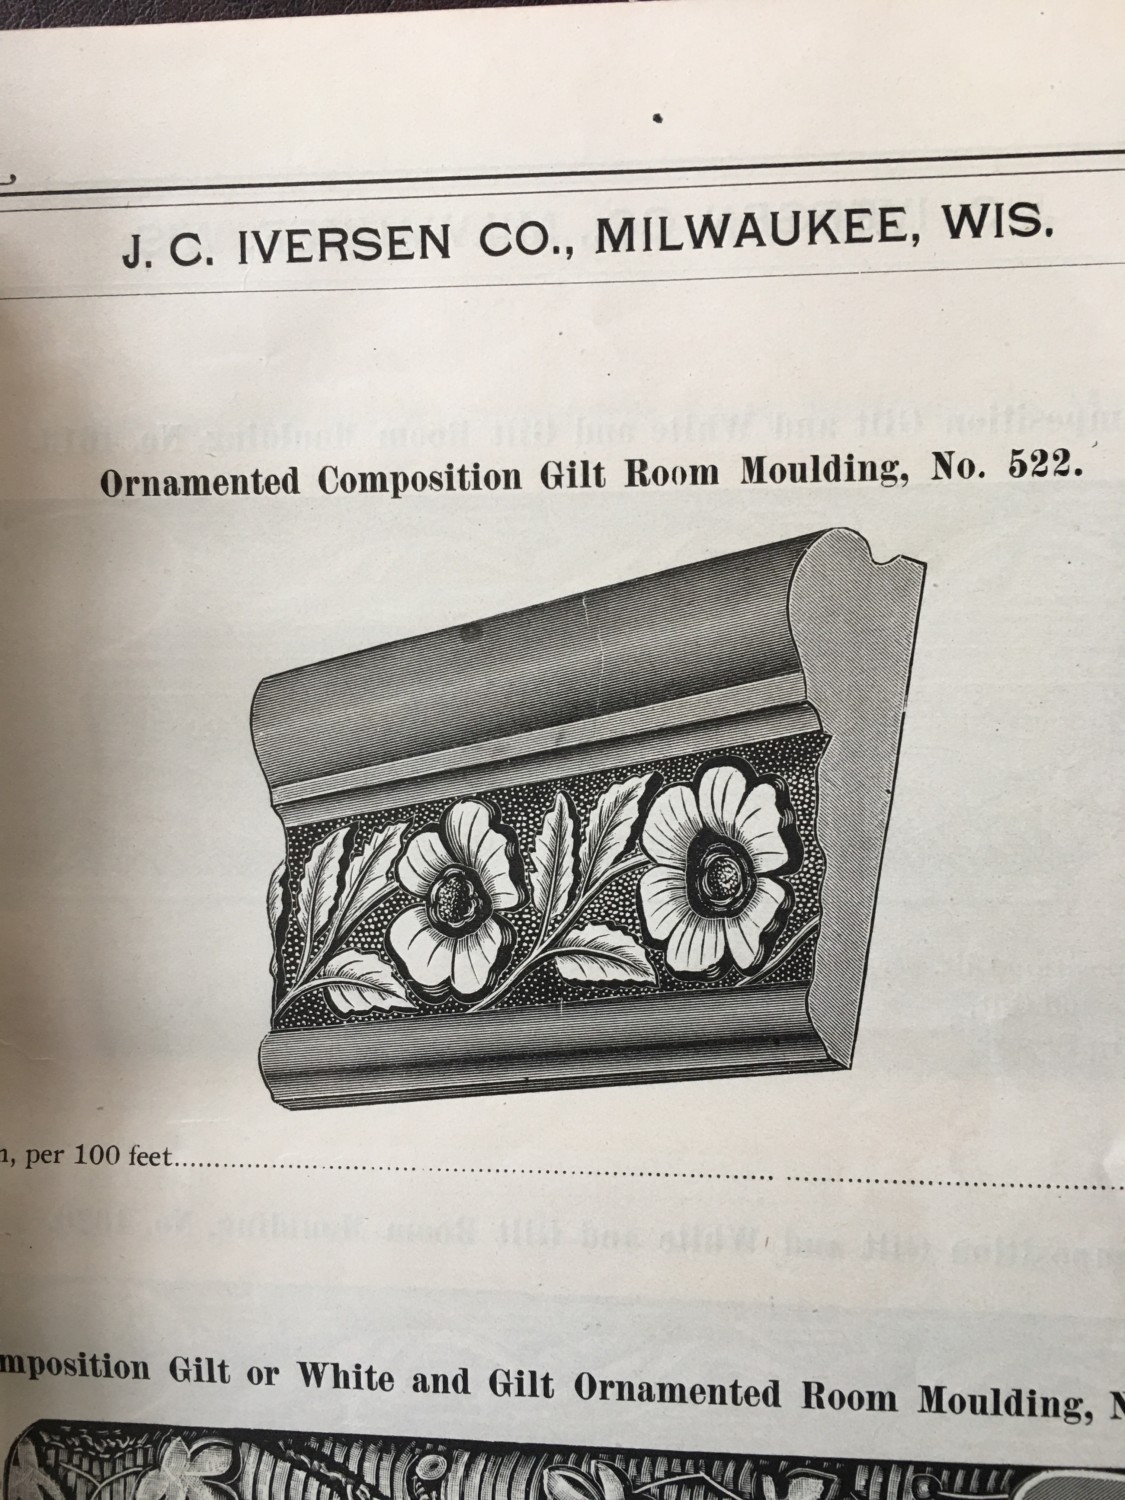
Supporting this line of thought? Bo recalled once seeing a very old invoice for papering a house. Included as part of the scope of work was….installing picture rail! And, Bo has catalogs filled with delicious picture rails. Image courtesy Bo Sullivan.

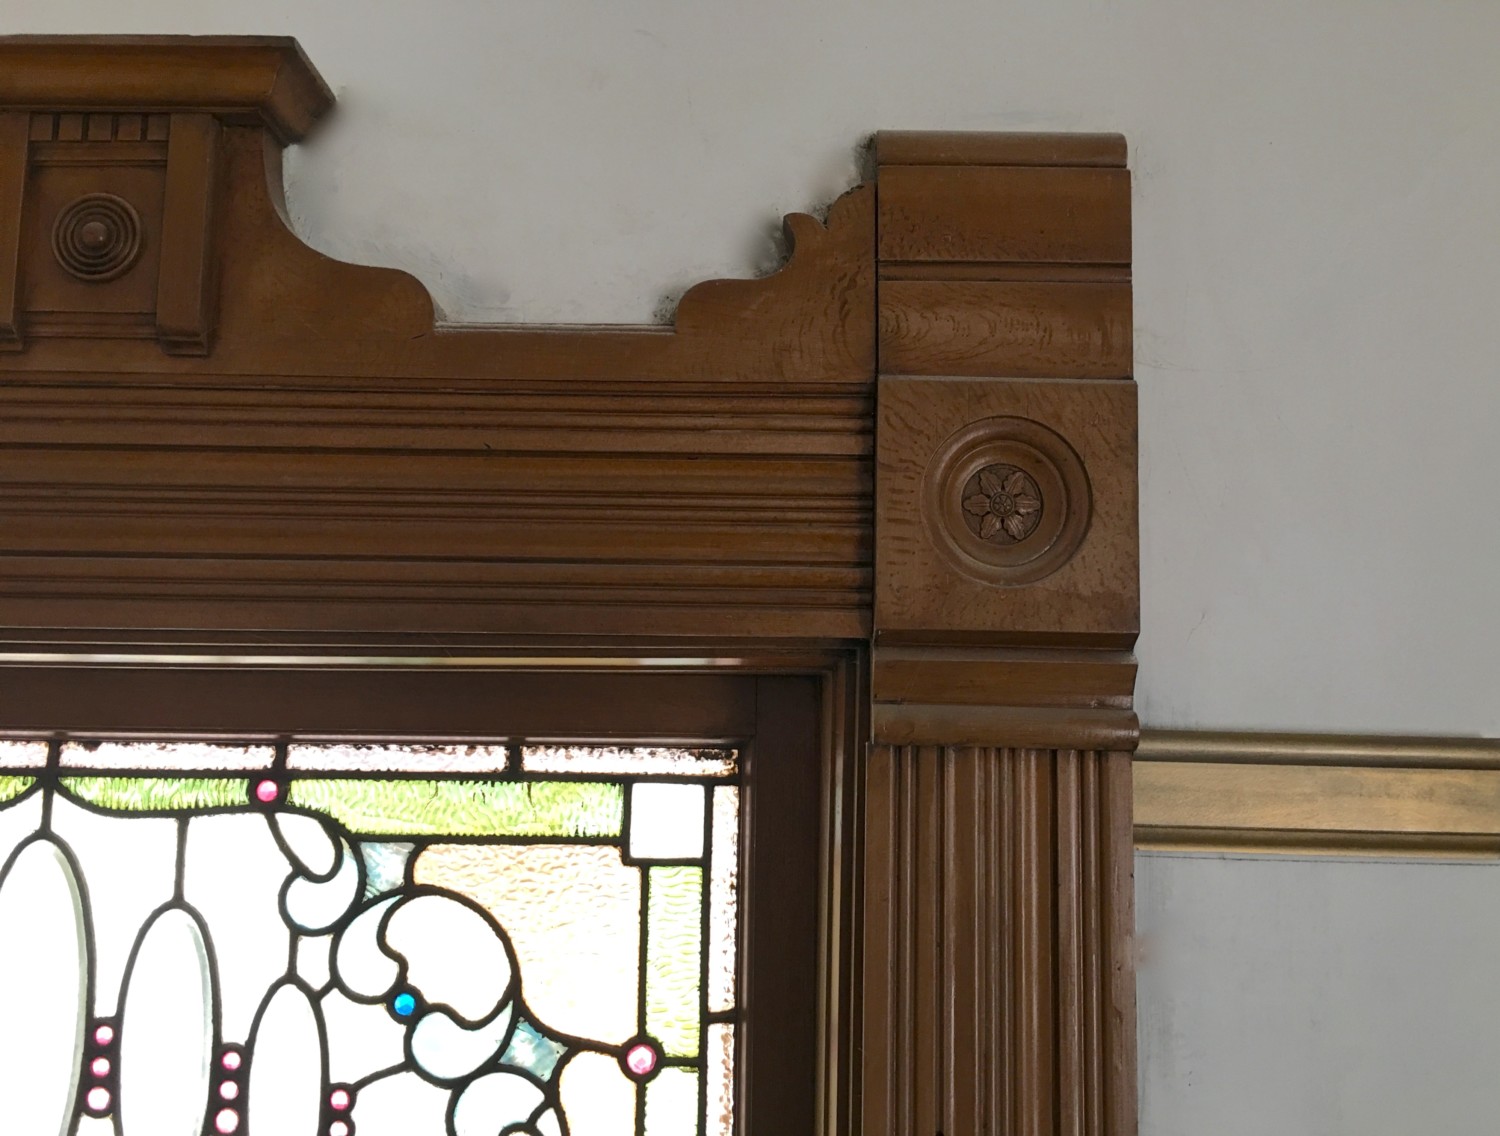
Moreover, it seems that it was common that picture rail, which I had always presumed MATCHED any adjacent trim, did not necessarily do so. Oh. Oh! Here you see a gilded gesso rail.

Amazingly, gesso picture railing is being made again! You can get it in gold, silver, or unfinished! I briefly lusted after this but it isn’t correct for the Cross House, style-wise. Sigh.
So…so…so…IF it was common that picture rail was something installed separately from door and window trim, and IF it was common that picture rail did not necessary even match the other trim, then why was I working so hard to match my newly purchased rail to the original trim???????? What if I burnished it…gold?

All of this, it seems, has cleared up another mystery. Previously, I posted about thin gray lines, about 1/2-inches high, which are all over the house on bare plaster. The lines were where the picture rail would have been. But what did they mean? They were way thinner than the picture rail itself, and other readers wrote in saying they had the same odd situation in their old house. Well, thanks to Bo, it appears that these thin lines reveal where the frieze papers were separated from the wallpapers by about a 1/2-inch. And this exposed plaster (even though covered with picture rail) got dirty over time. Oh. Oh!
Well, all this kinda blew me away.
It fascinates me that a standard practice, seemingly, was that installing wallpaper AND installing picture railing was part of a paperhanger’s job. Gee. Who knew?
It also fascinates me that picture railing did not necessary match any adjacent trim. Gee. Who knew?
Well, Bo knew.
But I suspect that Bo is a time traveler.

19 Comments
Leave a Comment
Your email address will NEVER be made public or shared, and you may use a screen name if you wish.
I have been waiting for your next post. I find this information so very interesting, and it makes sense that they would change it to go with the new decor.
I am curious, what will you use to hang pictures from the picture rail? I’m sure that in the day there were decorative cords available, but I’ve haven’t seen any for sale anywhere. I’m planning to install picture rail (thank you Bo for suggesting a gold finish) and looking for ideas…
Small metal hooks are used, available in a wide variety of styles and finishes. I bought ours from houseofantiquehardware.com, but you find find many internet retailers that sell them.
Pictures would traditionally have been hung with a decorative cord, but I sometimes use clear fishing line, similar to art galleries do.
You could check into macramé cord. It comes in a variety of colors and is available online, if not locally.
Parachute cord is another option. It is certainly strong enough! Fewer color options, though.
Try http://www.swanpicturehangers.com
What a fun post! I love having an explanation for the dirty line around all of my rooms.
in the 1890 house we are restoring, we found a piece of beautiful ornate gilt picture rail stashed inside a wall.
Oh! I wanna see a picture of your rail!
Wow, that is a very interesting piece of knowledge! I, like you, had always assumed picture rail was part of the overall millwork, with matching wood type and finish, but now I know better!
Perhaps the matching picture rail became more common later during the Arts and Crafts movement that eschewed the gilded and ornate Victorian style. That would explain the many original matching installations I’ve seen from the post-1900 period, and ones that are installed either at the ceiling (like our home), or at the base of crown moulding or coffered ceiling beams.
Wow. I’ve learned more interesting stuff about Victorian decorating from this blog. I’m forever grateful that you share what you learn with us.
This may be helpful.
Our Victorian (1890) had most of its picture rail intact. Not 2 1/2″. I think 1 1/2″(not as fancy or ornate here as the Cross House by any means). We reinstalled new rail where it was broken or missing. Some rooms we added Bradbury & Bradbury friezes–after rail was installed. Our rail is curved on top as all picture rail is. We were able to install papers as far behind the curved part of rail as we could. I preferred not to cut the paper. So my rail is 1-1/2″. Surely the footprint on the wall wouldn’t show that because paper went behind curved top. Make sense?
You are maybe over-thinking this?! Your rail has a curved top of course SO it does not have a full 2 1/2″ touching the wall – that’s why the silhouette is smaller.
Also we painted the rail in many rooms a gloss version of the wall color instead of trim color. This helped a lot with the original rails that weren’t in the Greatest shape. ☺️It looks great!
Stupid question time: How would they fasten the picture rail to the plaster? I would think you’d cause some of the same damage you were trying to prevent with the rail by removing/refastening rails to the walls every time the wallpaper was replaced.
I had the same thought.
Did they just carefully push the old nails back into the original hole locations?
I myself have done that.
I have plaster walls in my house. You can either use a nail gun or a finish nail and hammer. Either have worked well for me. The nail gun w/ air compressor is the fastest.
I thought the same thing! I thought there had to be a bajillion tiny tack holes in the walls. If you push the nails back into the previous holes, how would it hold up the ornate heavy frames hanging from the rail?
This is really interesting information to know and will help with my decisions when I get to redoing my living room. The previous owner had reinstalled picture rail and also put in crown molding. But, like everything else he did, it looks awful. I like the picture rail, but it does not match the original faux finish on the window and door trim. Now I know I can paint it! And it does make sense that one would choose a picture rail to coordinate with the wall paper. I LOVE the one with flowers. My house was originally built by a Doctor Gardener, and I am a master gardener, so that would be a cool choice for my house! Thank you for sharing all your knowledge!
After seeing the ad, it would make sense to change the rails. Composite doesn’t come off nicely as millwork would. I am restoring dolls made of composite and all composite is…is glue and sawdust pressed into a mold. While it is tough when dry, it crumbles when damp as you would expect. So the process of removing wallpaper would irreparably damage the original in the first place. Even just washing the walls with a rag would allow water to touch that composite, causing it to swell and leave a pile of dust. Interesting to see what was common knowledge isn’t so common now!
In the UK, picture rail is usually moulded wood with a flat backing which is nailed into divits of wood which are inserted into the lathe and plaster every few feet. The wood divit allows the picture rail to be nailed on.
The back of the rail moulding is usually narrower than the moulded face. I wonder if this might account for the narrowness of the line – meaning the hanger would paper to the base of the rail for the wallpaper, and from the ceiling down behind the raised profile. I can find images (link attached) showing similar moulding which I re-installed in my flat, and you can see there is a difference between the height of the flat back and front.
It was not usual practice to replace the railing time after time though it may have been in the US. In the UK, railings – either picture or dado height usually lasted in Victorian and Edwardian homes until the 1950s onwards when modern tastes started to want flat walls, no ornamentation.Many homes lost their panelled doors, picture rails, fire places and mantels etc at the same time.
The picture rail in my front two rooms was always stained dark to match the woodwork, but the bedrooms and hall were always painted to match the walls.
I removed the picture rail in my house to refinish it. Before I got it refinished and reinstalled I papered the walls. It is so much easier to do it this way. The existing holes in the removed picture rail can be matched up with holes in the walls to make sure that is where it was originally. I putty these holes with like color putty and use them as an indicator of where the wall studs are located and renail in the same place, but not in the same hole. To be secure enough to hold pictures, it has to be nailed into the wall studs. Today’s nail guns work much easier than finish nails. Not many of us are skilled with a hammer any more.