
I Broke The House Today

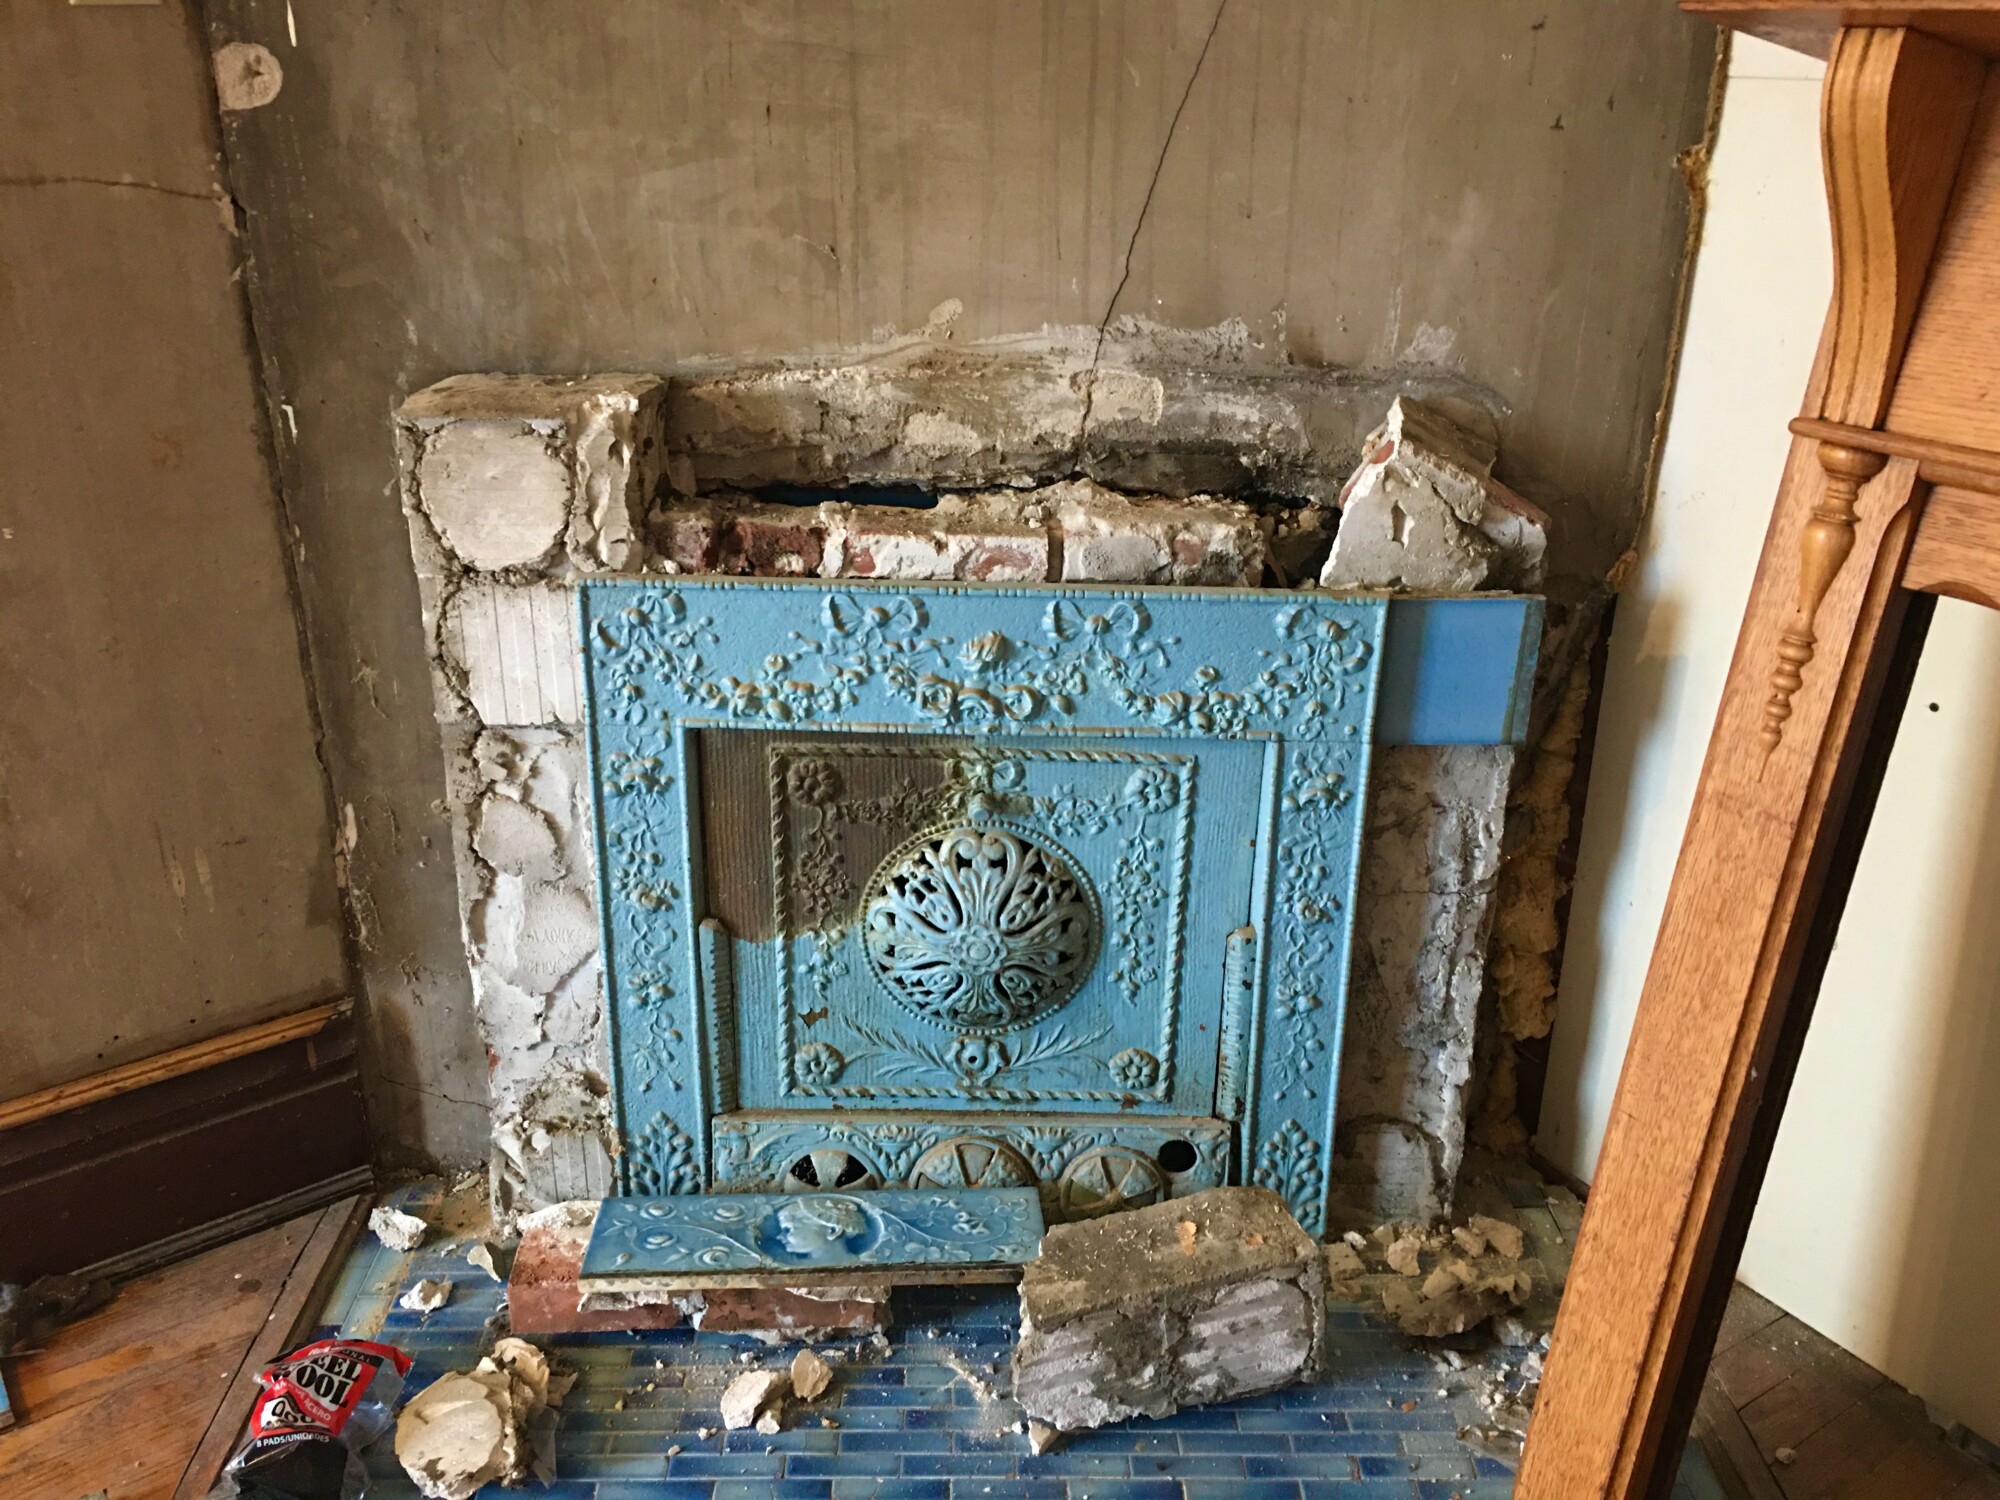
The mantel in the Round Bedroom, after being restored by Kenny in 2018. Note the two missing blue tiles, upper right. The tiles were loose and I was afraid they would fall and break, so in 2014 I removed them and they have sat ever since on the radiator.
Today, I planned to reinstall the tiles. Easy-peasy, right?
Then I realized that what they had been attached to was (mortar and bricks), itself, no longer attached to the house.
Oh.
Ok! Another easy-peasy fix, right?
In the process of pulling out the chunk of mortar/bricks, I realized that the adjacent chunk, left, was also loose. This held the incredible center blue tile.
Oh.
Ok! Another easy-peasy fix, right?
Carefully, ever so carefully, I removed the center tile, still attached to the chunk behind it.
Then I realized…
…well, you know where this is going.
Things got ugly really fast.
Scroll down…
Fuck.
A single blue tile is still attached. The bricks/mortar along the top just crumbled to the touch.
Fuck. Fuck!
I had not anticipated this, and do not quite understand how to fix it.
Slowly, I tip-toed backwards out of the room, closed the door, locked it, and vowed to never enter the room again.

33 Comments
Leave a Comment
Your email address will NEVER be made public or shared, and you may use a screen name if you wish.
Oh, I am laughing when I saw this…though I know it isn’t funny in the least. But, Ross, you told the story in your usual way…and I started to laugh all the while saying, ” Oh, no!”.
Time to put Humpty Dumpty together again.
You said it perfectly! 🙂
OH NO! Do not despair Ross. The tiles and attached mortar can be soaked in water over a number of days. I believe this simple process will release them from each other without damage. The bricked backing is just a mortar job. You can do this. Be thankful that you took it apart carefully and did not have those gorgeous tiles fall and break.
Jim is right! That delicate and beautiful tile work was preserved with your careful handling and will separate from the brickwork with soaking. As usual, the Cross house trusts you to handle the challenges it’s fragility presents. You knew there would be fresh problems to puzzle out- things even someone with your depth of experience never encountered. That may have been part of the house’s attraction. So much time passed and passive neglect is a potent combination. Much more than brute strength and the array of skill you’ve developed over a lifetime has been often required. There is also the element of surprise. LOL, the restoration almost seems reciprocal at times! In my own restoration projects it always seems that each entity- human and house- is restoring the other!
My Oma would say: “Ach! Mein lieber Gott!” You need some divine intervention, Ross. I will say a prayer for your mud job. And may God keep the Gremlins away from you and your house!
Days like that cause me to fantasize about selling the house, renting a nice apartment and letting someone else do the maintenance. I know you’ll figure it out.
While painting the exterior of my house a few years ago I discovered that the stucco was failing on the fireplace chimney. About half the stucco came off with my bare hands. Fortunately, before attempting further repairs, I had a preplanned trip to Venice, Italy. Near my hotel was a 800 year old palace undergoing stucco repair. I walked by it every day and saw each step of the workmen repairing the underlying brick. And then the scratch coat of stucco. And then the finish coat. I was inspired and came home and did a damn excellent job of repairing my chimney. You’re going to do a fine job!
Wow! 🙂
I suspect your chimney had a failed concrete (or stone, or other construction) cap that permitted water to get between the flue liner and brick and brick and stucco? That’s one of the most common causes of deteriorating chimneys.
Which reminds me I really need to get up and take a closer look at ours. It’s brick-faced, but has some concerning areas from 30ft below on the ground. I’m sure it’s much scarier up close…
You have what it takes, you did the right thing in walking away for a bit. Do something else for a few days and then go back to it; I’ll bet that, when you do, you will know just what needs to be done. In fact, I would also bet that you come up with something that is better than the original.
Yup. Lock the door, and run to find TWO bottles of your favorite beverage. I know it’s discouraging, but the careful work you’ve done has saved the unique tiles. I know that my work sometimes gets stalled in exactly this way, but while I am actively ignoring the problem…sometimes I learn a new technique along the way that makes it incredibly easy. Here’s to you finding the perfect solution!
Yes, we have learned that a F#&% post today usually turns into a TaaDaa! post in 2 or 3 days, 🙂
You should know by now that it’s the But Firsts that really kill you. I hope you can fix the surround without major problems. At least you have the tiles!
If the brick and mortar were that feeble I’m glad you were there to hold the tiles as the B&M fell to pieces. The tile might have been injured otherwise. Better what happened yesterday than coming in some day and finding things had fallen to the floor who-knows-when. And I take comfort from the folks who know something about mortar who say it’ll be allright. Phew.
So Sorry! (When I used to sew alot and got fed up with something that would not work or fit, I threw it in a corner to be dealt with later). So you did right. Seems u saved all the tiles. Especially glad to see the long middle one in tact. Onward… 🙂
Dearest Ross!
This too shall pass…..
Devastating but your loyal readers have offered some ideas 💡 and perhaps 🤔 they will help….
As Michael said, I also will offer a prayer 🙏🏻
I can’t resist saying,”Don’t be all broken up about it.”
Really you have done yourself a favor. It may look bad, but it is clear that this work needed to be done. As long as the tiles themselves didn’t break, and even if some did, it is all repairable.
Okay, your comment cracked me up. Lol
Breathe. Into each life, some broken house must fall. Take some time, and regroup when you’re ready. Ask for help if you need to. Breathe.
You’re doing a great job, Ross. This is just a temporary setback. All great jobs have them!
Rebuilding the front of that firebox should be a pretty straightforward masonry job. Like others have said, better to find out this way where you were able to carefully disassemble by hand, rather than to find all the tiles shattered on the floor one day akin to the receiving room window.
Another silver lining – this will give you every excuse to finally strip the paint off of the summer cover and surround to reveal the original metal finish.
*This. I can’t agree more with all of Cody’s points.
At the same time, I know that a new project is the last thing you need.
OH NO ROSS, this is horrible! Those gorgeous tiles, but at least they aren’t broken. As everyone has said, this is doable and a fairly easy job. Somewhat easy?? You will figure it out, you always do. But you sure didn’t need this.
When I scrolled down, I literally gasped (which never happens). And I agree with the initial sentiment to lock the door and never come back. But the bright side is that you have good photos, so you know what it’s supposed to look like and can more easily put the right tiles back in the right spots.
Poor Ross! What a disheartening development.
On the bright side, it doesn’t require shingling…
So very true, Celeste!
I can imagine the exact sequence of events: The actual firebox was roughed out by the masons earlier during the construction, and faced with plaster. The tilers did not get in there until the mantle was available so that they could get a good fit, which required building out the firebox several inches. And who cares if its a quality job- nobody will ever see it! The plaster would have sucked up all of the moisture from the cement, preventing a solid bond. Active use of the firebox would have cracked the cement apart, with settling doing the rest over time.
As long as the tiles are intact the rest is no problem! You might even consider mounting them to something removable like a piece of cement board, perhaps even with a reversible adhesive, particularly if you have no plans to use the fireplace. In either case, the cement portion can be rebuilt the same as it was, with fire bricks and mortar, though I would consider removing what’s left and starting over to get a good smooth surface.
The one thing I might do first is carefully remove the debris from the tile on the floor, use something gentle to sweep up the dust, and put down some kind of drop cloth. That old tile scratches so easily, as you must know!
Thank you, Adam!
Was there any water damage in this area, or water leaking inside through the chimney? I wonder if that may have contributed to the deterioration of the masonry behind the tile surround.
The flashing around the north chimney long leaked.
It ruined part of the plaster ceiling, the 1929 oak floor, and, I now know, the chimney itself.
I think the real headline here is “I saved part of the house today.” Because you saved that beautiful blue fireplace. Well done, Ross.
I know you will be able to fix this Ross. It has happened to me more than once that I have tried to fix something and made it worse. It is always upsetting, but I always learn something from it. Like I need to have more patience…. not suggesting that you need more patience, but I do. I have very little patience. I just want to make things better…as you do. And you will do with this beautiful fireplace.
But I must say you have written some great headlines this week- this one, and “Bad Shit.” I think you still have some NY in your soul.
I am looking forward to all your updates.
You are quite loved.
Thank you, Karen!
Thank you for my laugh of the day. I’m still laughing. Can’t wait to see what happens when the door is unlocked in the far away future 🙂 I’m sure the tile fairies will have come and made it all beautiful again. Isn’t that what we all wish for at the end of a day like this?
I’m crossing my fingers for tile fairies, Lisa!