
Inching Along
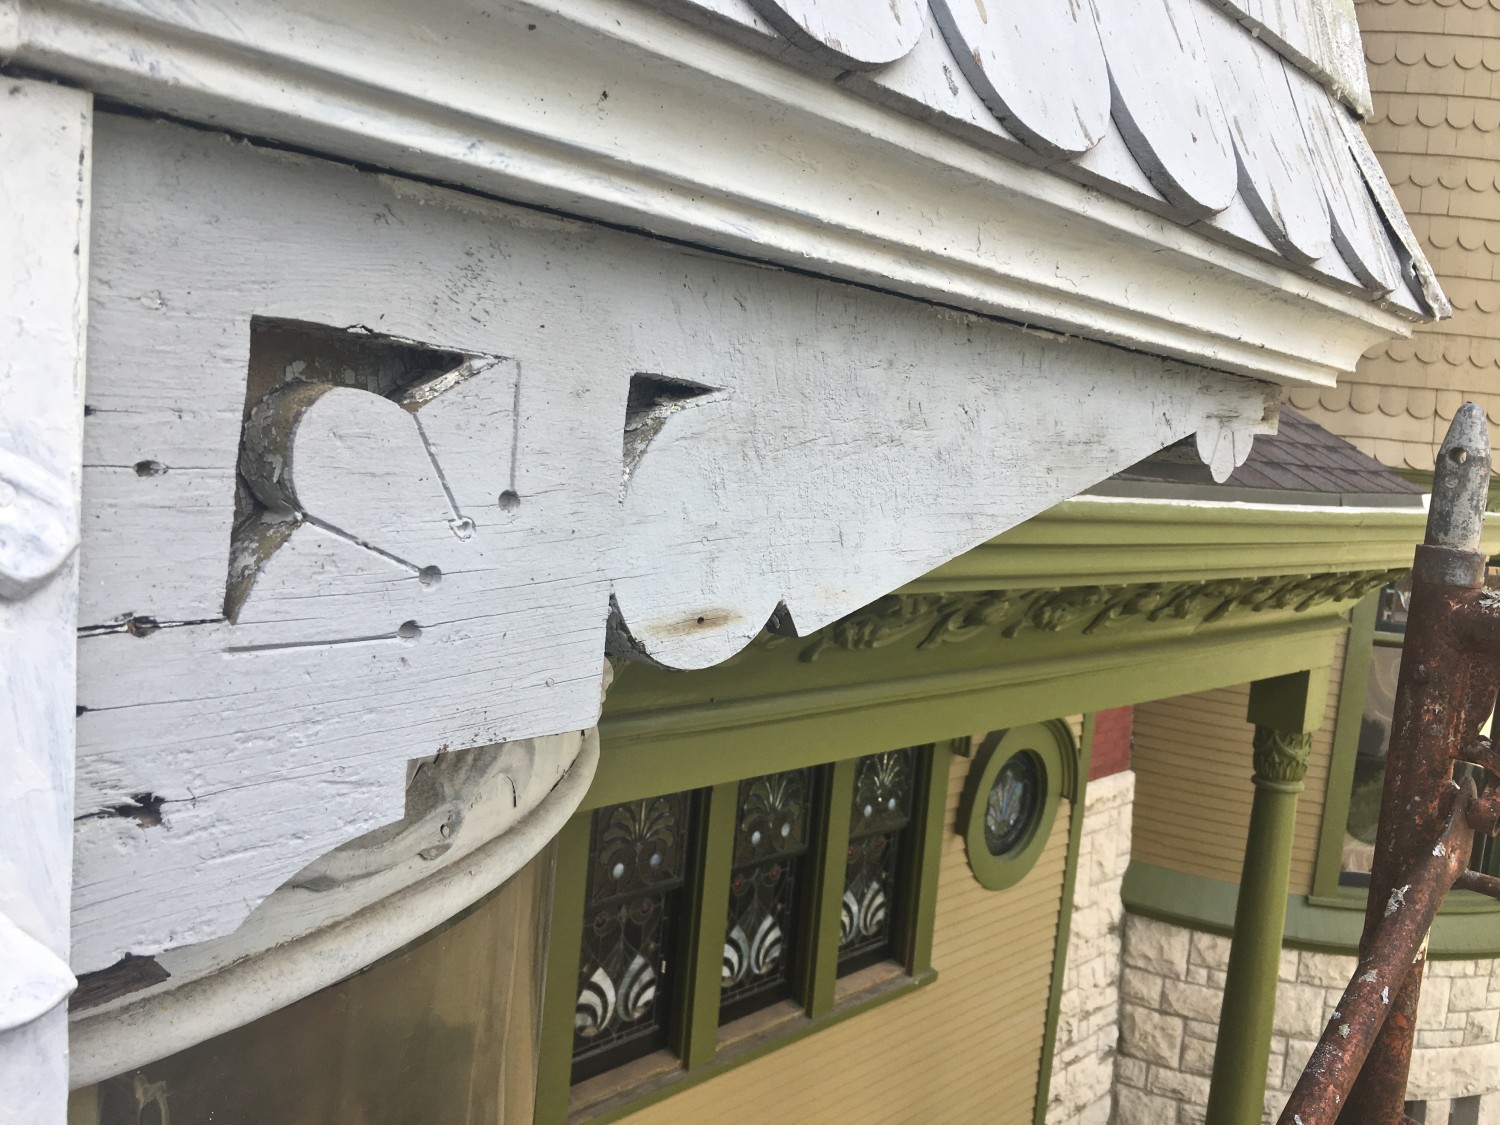
Last week.
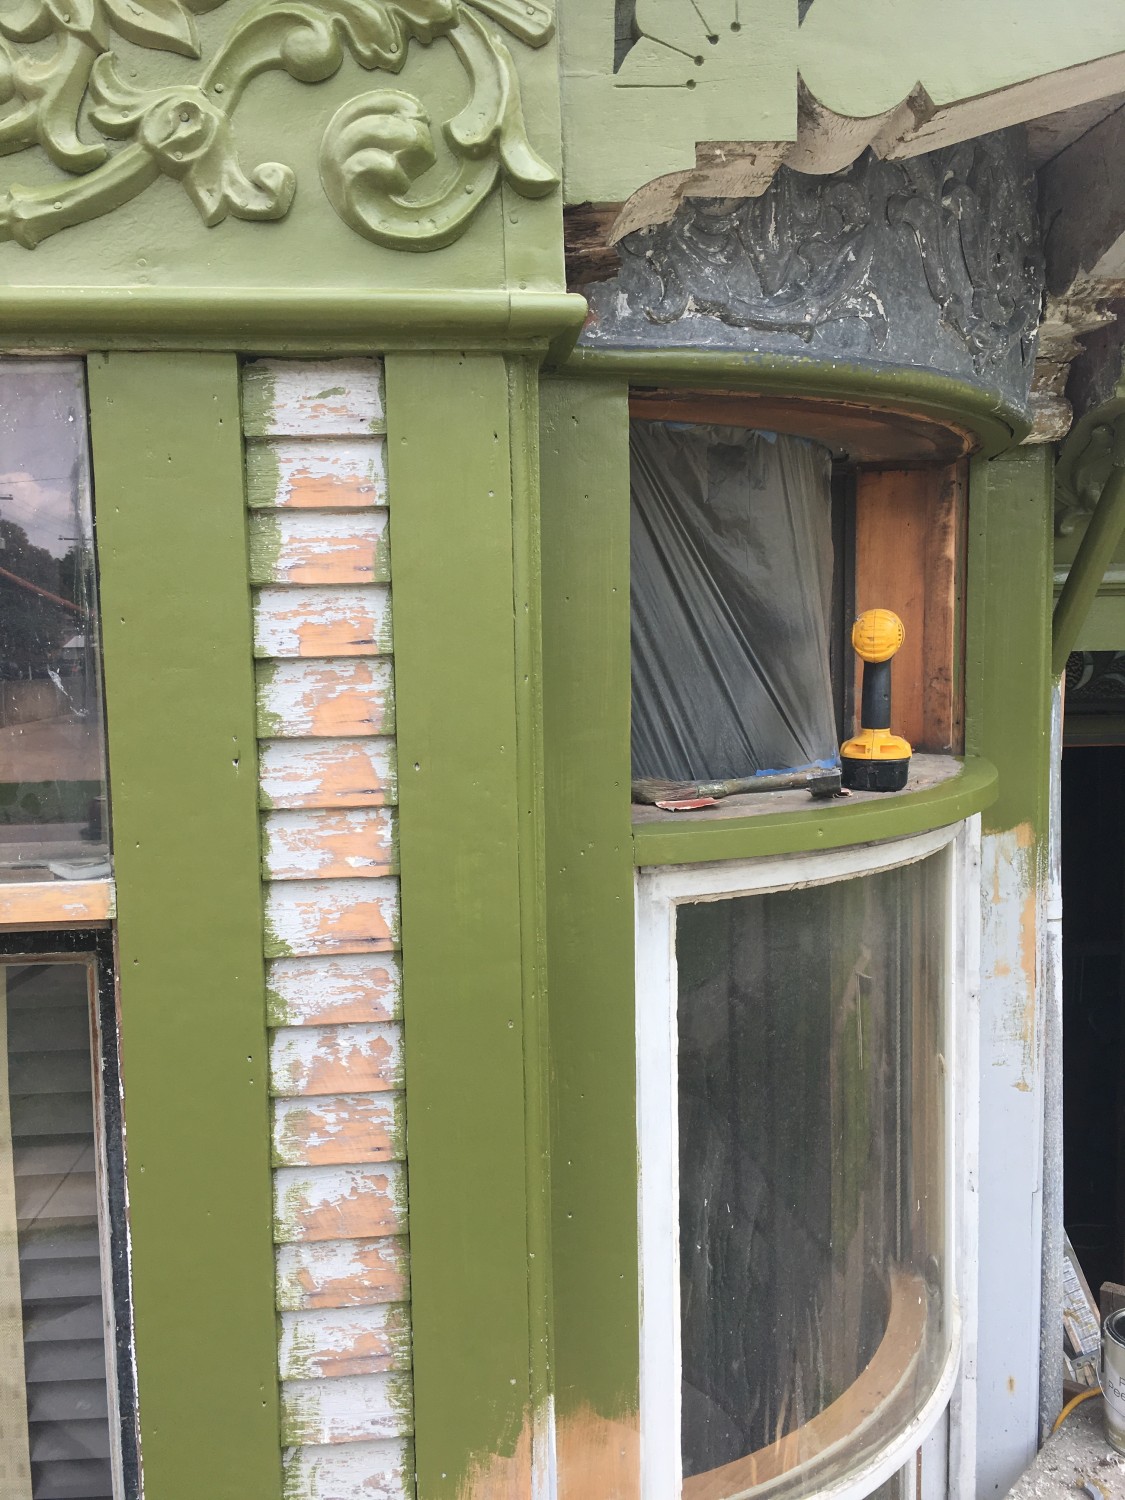
A few days ago.
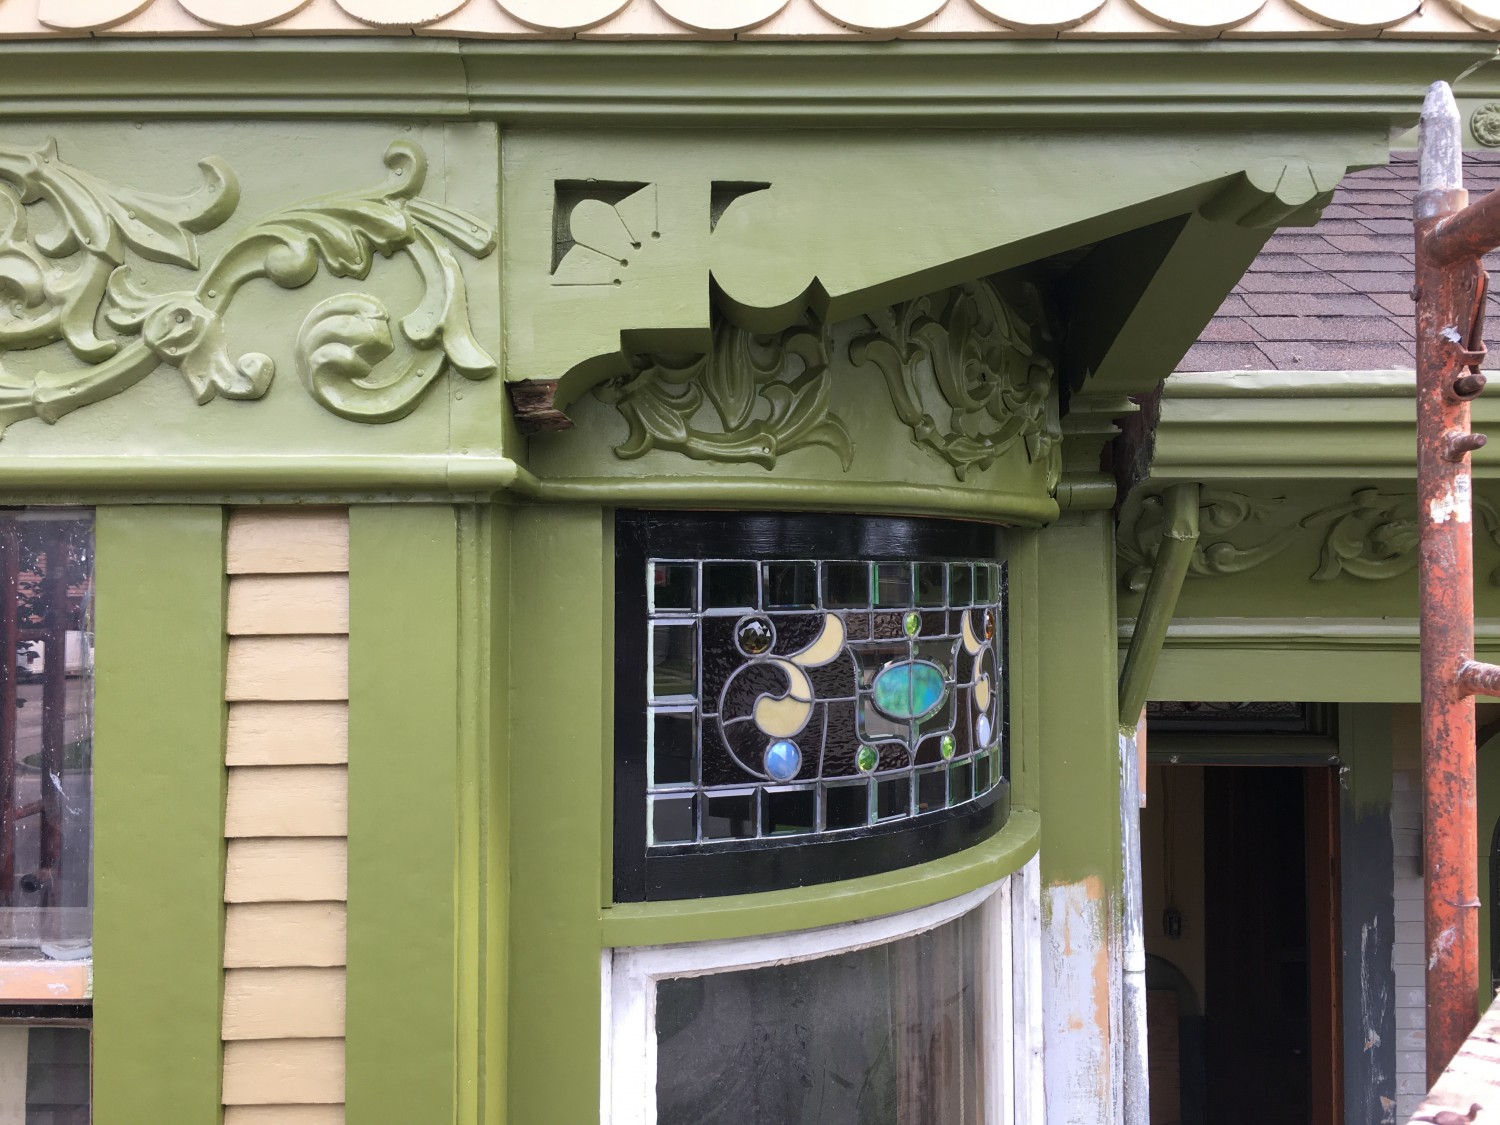
Today!!!!!!!! An extraordinary amount of work has gone into the small area. I still need to replace the rotted bottom section of the bracket. Then, I need to repeat all the tedious effort on the brackets/curve to the left.
I love watching the pretty new colors slowly drip drip drip down the house. I am SO excited that the Great North Wall might actually get finished this month!

23 Comments
Leave a Comment
Your email address will NEVER be made public or shared, and you may use a screen name if you wish.
MADE MY DAY! Beautiful!!
Someting about the lighting on that last picture is superb..
It’s fun to look at the brooch in the upper-right corner of the bottom photo, and then imagine how beautiful the north wall will look when the painting is done and the red paint is gone.
You truly are going slow to go fast. Doing a job right is more work, but the result — in this case — is so much more beautiful. Or crispy 🙂
Beautiful & crispy!
Looking really nice!
There are no drips in the paint, nor otherwise associated with the Cross House or Ross MacTaggart. You must find a wonderful metaphor that is as inspiring as your meticulous work!
Agreed, Stewart. Really, when you look at it, it’s almost as though the old paint, dirt, and age are melting like wax from the house, revealing the original beauty hidden underneath.
Seeing this north wall come back to life is almost therapeutic, Ross!! It’s like seeing someone who has been deathly sick make a full recovery.
I know what you mean, Mike! I am livin’ for the scaffolding to come down later this month!!!!!!!!
I especially like how that last photo so clearly illustrates that you don’t need sharply-contrasting colors on ornate exterior detailing. On your house especially, the profile and relief of the tin and wood emphasize it sufficiently.
Furthermore, by not emphasizing every detail, a viewer is engaged interactively in discovering and observing all the little details and flourishes, rather than having it colored and circled for them all at first glance.
I would compare it to how a beautiful person dresses. You want your clothing to suggest beauty and refinement, but in such a way to attract your attention and interest without being gratuitous.
Thanks, Seth.
I continue to be surprised by how much all the detailing on the house shows up, even though painted the same color. This is even more evident in person.
The effect is quite elegant. I often stand in the yard, a little awed.
Every time a few days go by without hearing from Ross, I think to myself, ” Ross is busy (BUSY!!). And then I smile, because I just know that there will be another wonderful reveal on its way soon! Much inspired, Ross!????????
It is possible to reuse the undamaged portion of the West most bracket’s outside piece. Here is the way I would do it. I am writing instructions as though you or others reading this have never used a router. You must use good judgment about the use of safety glasses, dust masks, hearing protection, and other safety equipment.
You will need clamps, a good router that has a ½” collet, a ½” straight bit that has a cutting length as least as long as your bracket is thick, and a good straight edge that is at least the height of your router base for a router guide/or fence. They make aluminum straight edges for just this purpose.
First you need to make a perfectly straight flat plane on the old piece where the damaged area ends and on another on your replacement piece.
Make the plane on the old part before making the new part. When using a router, I find that the three biggest problems are caused by:
1. not tightening the bit enough.
2. turning it on after resting the base on the surface. The speed of the router causes quite a bit of torque when you start it. While holding it free of any surface, you can adjust for this when you turn it on. While resting it on a surface, it can cause an uncontrolled jerk, which can throw it out of control, which can cause an injury and/or ruin your work.
3. trying to cut from right to left. The blade spins the wrong way for cutting in the other direction. If you try it that way by mistake, you are unlikely to injure yourself as long as you keep both hands firmly gripped on the router’s handles.
It may seem obvious, but try not to tense up and hold your breath while working with the router. I find myself doing it and realizing that it is making it difficult
–
1. With the bit firmly tightened in place, set the edge of the base on any flat surface. Lower the bit so that the top of the cutting edge is set slightly above the surface and the lowest part of the cutting edge is below the thickness of the piece that you are repairing. People often try to use the flat edge of the router base against their fence, thinking to run the flat straight edges of tool base and guide against each other, but if your motion is slightly off, the edge you are cutting becomes uneven. You are now almost ready to make your perfect edge on the old damaged piece.
2. Before working with your original piece, try this with a one to two foot long piece of scrap 2×8 first. Clamp your work piece to a very secure surface. The edge that is being worked on must extend beyond the work surface. Clamp your fence the approximate distance plus ¼ ” from the router bit’s cutting edge to the round edge of the router base. Your fence should be placed so that a good several inches of its length extends beyond both ends of you cutting area and without any clamps in that area either. If possible, clamp the fence from behind so that the entire fence surface is clear for routing.
3. Holding the router firmly in both hands, with the bit nowhere near any surface, switch it on. After you have adjusted to the torque, place the bottom of the base on the surface of your 2×8 on the left side of your surface with the square portion of the router base, if there is one, facing you, that is, away from the fence. Then move the router base against the fence to the left of the edge. Sliding the router toward the right, move very slowly as the bit comes in contact with the wood. After it has begun cutting, you can increase your pace depending on the hardness of the wood and how much control you feel you have. You may push one or the other handle closer to the fence at any time as long as you keep the flat base bottom flat to the surface and the round edge firmly against the fence. You may also pull the tool away from the cut in the same manner. Never turn the tool off while the bit is in contact with anything, nor take your hands off both handles until the bit has stopped turning completely. If you want to experiment with the tool, the sample piece is the place to try to experience the lack of control with a right to left motion (not good, it will jump around in fits and starts, not giving you a clean edge) and with moving it into the edge to be cut from anywhere but the left side (OK as long as you do so while moving the router to the right and are controlling it).
You should now have a sample with a straight flat edge unless you pulled back from the fence a little or didn’t keep the base against the fence. In that case, make another pass with the router held firmly against the fence. If you tip the router toward you, it will make a divot in your plane, so keep that router base flat in contact with the surface. Measure the exact distance from the new edge to the fence. This is the distance that you want to clamp the fence to the old work piece before routing a new edge.
–
When creating your flat straight edge on the old section, the surface that your bit is cutting into will be uneven. Be sure to use soft wood blocks without knots between the old piece and the clamps. Clamps will put dents in the blocks instead of the finished piece. If the surface on the old piece is not flat, take the whole part and rub it across a full sheet of sandpaper that is stuck to a flat piece of ply or melamine until it is a single plane, or very close, before attaching the fence. You might need to pull away from the fence to remove larger protrusions on the old piece. You really don’t want to plow right through material that is wider than ½ of the bit diameter if possible in one pass. That makes it much harder to control the pass. As long as you end with a single clean pass, you will be fine. It is important to measure the exact distance from the clean edge to the fence before you remove the fence from the sample. This is the distance that you will put the fence from your proposed new edge on your old piece that you are repairing. For making planes to create gluing surfaces, this technique works best on pieces that have the grain running in the same direction or less than about thirty degrees from the grain direction if you want there to be an invisible glue joint for your repair. You can obtain a clean plane with this technique on grain going in any direction, but for the best glue joint, you want to glue surfaces with long grain to surfaces that also have long grain going in the same direction.
–
For your new replacement piece, I would use Spanish cedar of the same width. Cut it to rough size so that the grain goes in the same direction as the old bracket. Make your gluing plane on the same angle as the spot to which you will be attaching it.
When gluing and clamping your two pieces together, they will tend to slide because your clamps will be atop and bottom while your planes are at an angle. It is difficult to keep them from shifting off square also. Clamp each piece to a piece of good plywood with wax paper under it so your work doesn’t attach to the plywood. Be sure that wax paper doesn’t get pinched in your joint. You can also use melamine without the wax paper, instead of plywood.
My favorite technique for avoiding pieces being glued from sliding is to put three or four very small nails in one of the surfaces. Cut them as close to flush as you can. This will leave very small points proud of the surface. Be sure to wipe off excess glue from the two surfaces before mating them. Manually press them together and the points should keep the surfaces from shifting. Nothing is more frustrating than doing a great repair only to find that your pieces have shifted when clamped. You can leave a little extra wood on the ends of the repair in case the work shifts anyway. Then you can trim it to size.
Once the glue is set, you can remove the clamps. Any detailing that you will be carving into the repair should be done after the pieces are glued together.
I hope that this is useful to you or one of your other disciples.
Stewart!! What wonderful detailed instructions! Pure woodworking artistry!
Sandra Lee, You always make me feel so good about sharing my experience. I don’t have the discipline to write a book, but I do wish that I could pass on my woodworking knowledge. Thank you for the encouragement.
Your woodworking expertise is a inspiration. You write what you know. We all love to read all the specifics of Ross’ genius & I am sure others enjoy the sharing as they might also benefit from the good ideas.
ZOUNDS, Stewart!
I think you should come visit the Cross House for a few months.
And bring your skills and tools!
Maybe we could swap skills. You could come to my much smaller and more modest house in Baltimore and do your painting magic to the exterior, windows etc., and I could do the woodwork that you need done. I would certainly like to visit the Cross House. I have had a secret yen to show up one day with a variety of tools and do the turned barber pole carvings on the, I believe, five replacement ballusters inside. I could show you how it is done at the same time, so you could do one yourself.
marvelous!
I second SEB!!!
Just Marvelous!!
I studied all these pictures again & the results are deliciously wondrous!!!! You are an artistic genius!!!! I just love your aesthetic!!
A
Maze
Ing
Well done!
Oh what a delicious idea for Stewart to have the opportunity to illustrate his woodworking artistry inside the Cross House & to show him some Ross-isms & Ross-techniques of restoration!!!