
Refinishing the Kitchen Wainscoting. Unhappily.
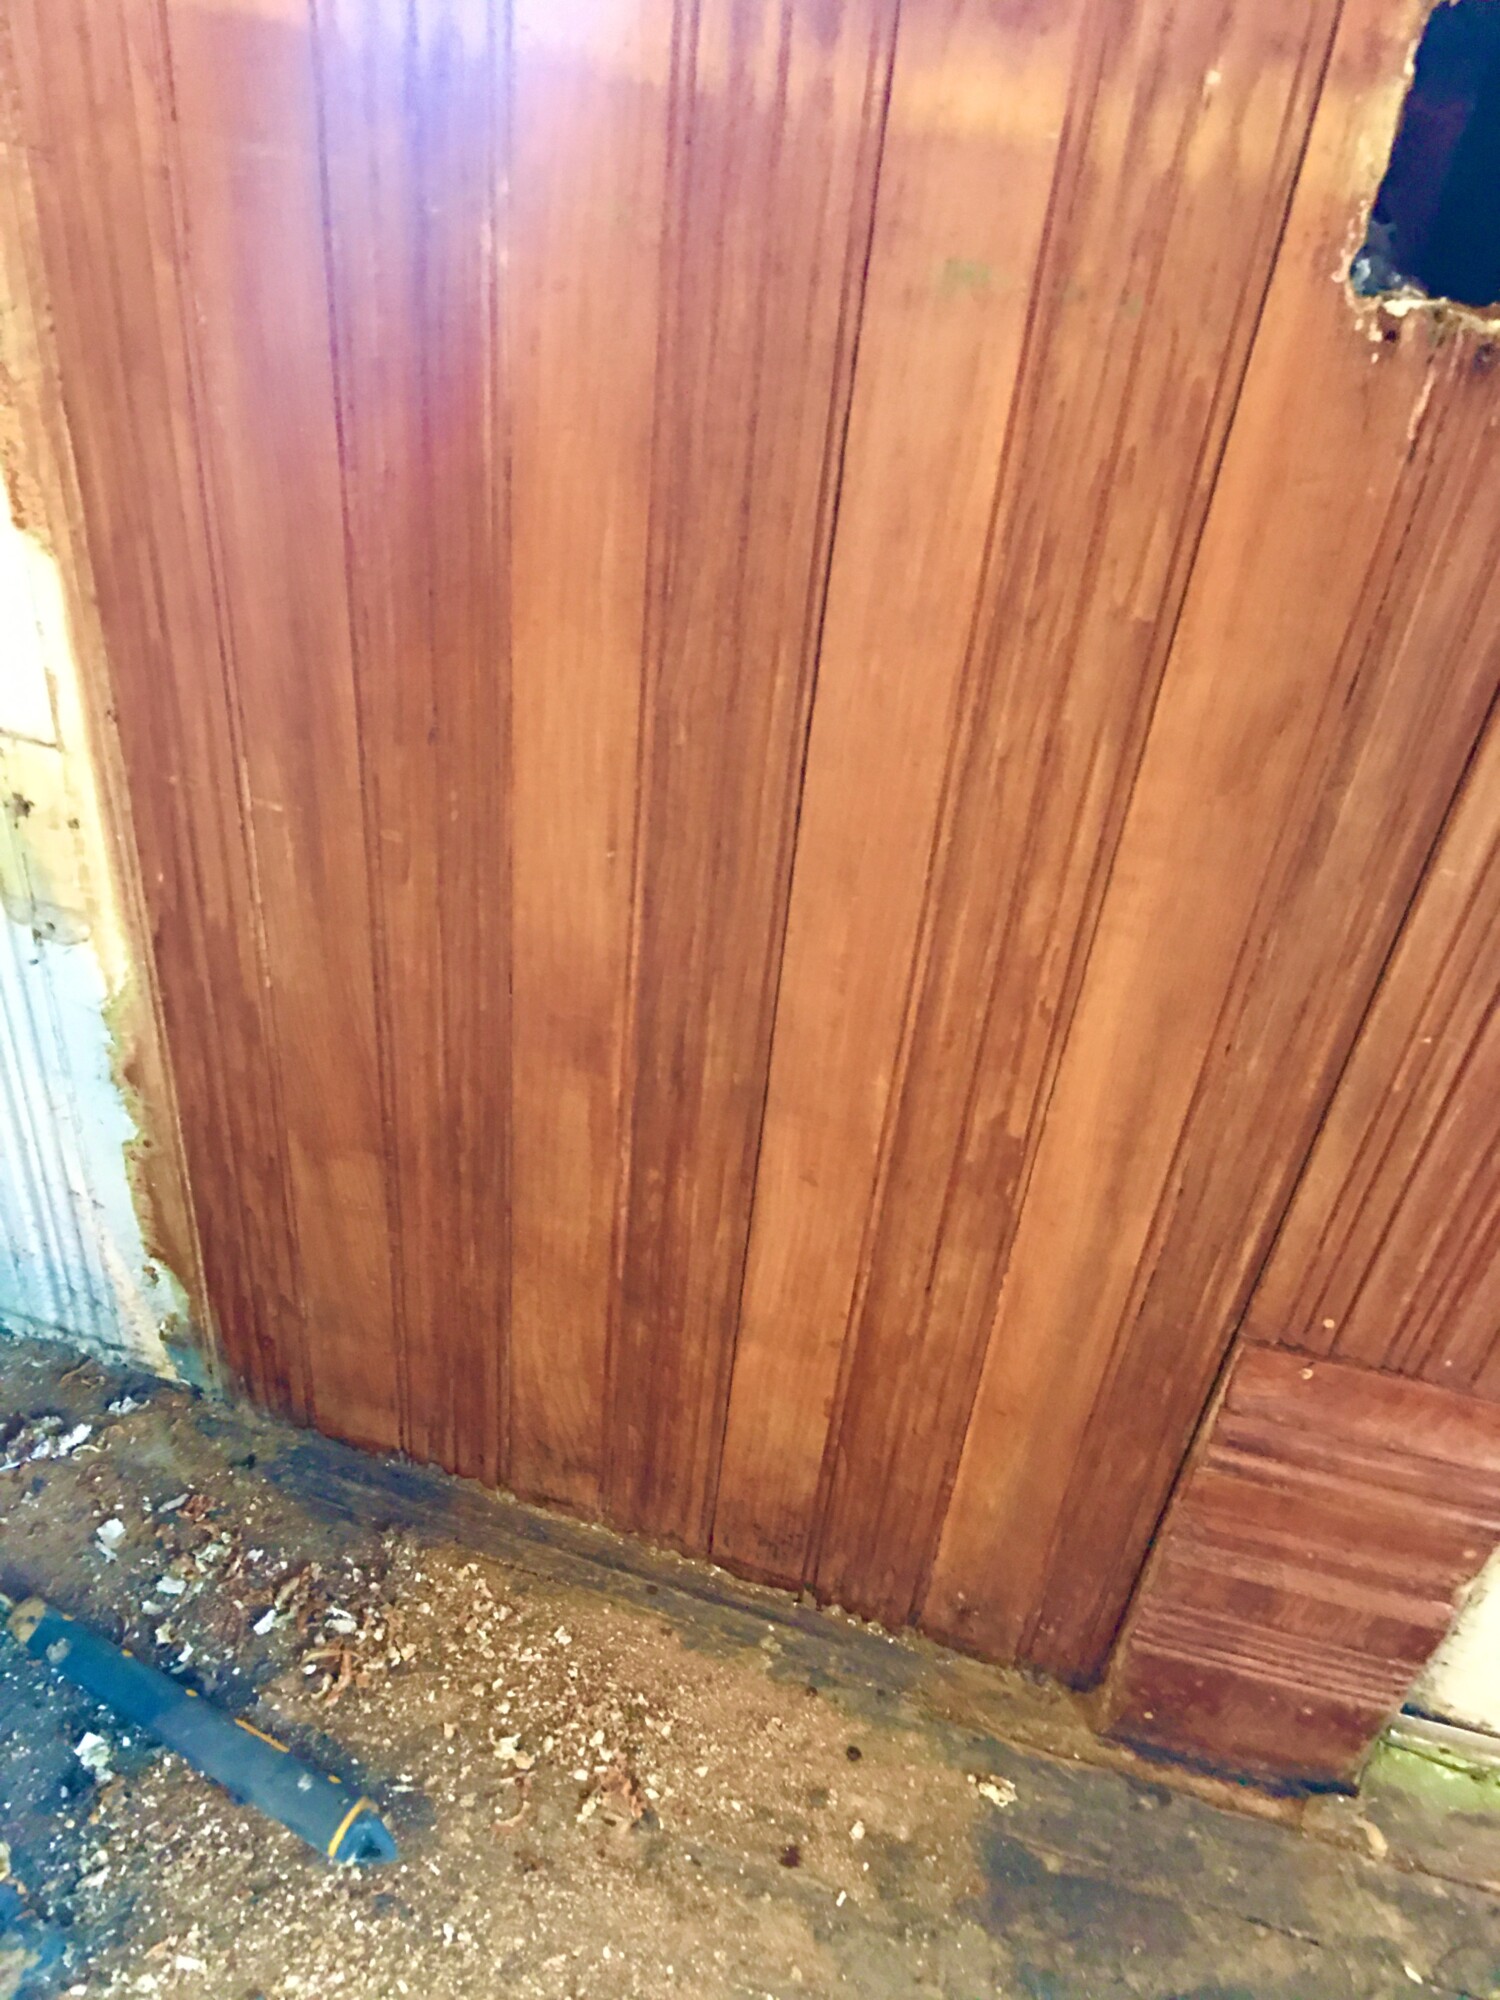
All the many layers of paint have been removed, and I also spent 90 minutes sitting on the floor with a dental pick for super-extra fussing. Then I used denatured alcohol to strip even more, fine sandpaper, and then a new coat of amber shellac. And this is the results: a blotchy finish. Ross is soooooooo not happy.
So…poo.
I have no idea what to do.
The wood would not have looked like this in 1894. I know because I have a section (behind a radiator) which retains its original shellac, and this looks consistent and quite elegant.
So…poo.

19 Comments
Leave a Reply Cancel Reply
Your email address will NEVER be made public or shared, and you may use a screen name if you wish.
Try using tung oil love it as afinish very durable http://www.miniwax.com, love the stuff have used it on a lot of furniture and restored trunks .Found that you can even make old hinges etc look good.I think fro experience you can put it over you’re finish it will take longer to dry .I know it is not recommended ,but have done it and was pleased with the results .Seems to hide bothers scratches .
Try Tung Oil love the stuff,hides a lot of sscrathes and blotches, it tells you not to use over finish but have found just takes longer to dry ,even makes steelband on old trunks look good .www.mini wax.com
That is http://www.minwax.com
You may need to use a stripper to get it down to the bare wood. Areas where there may be more or less shellac will take the new shellac differently. I never stain or put on a new finish without using Minwax pre-stain it opens the wood and helps for an even absorption of the new finish. Just an idea.
No stripper on the shellac, please. Only denatured alcohol. =)
Ross, was this only one coat of amber shellac?
Yes, Bill.
What a dillema lol. How long did you wait, after the DA, before the shellac? I’m sure you could even it out with DA and 0000 steel wool. If not, certainly leveling the surface by doing 3 coats, and sanding between each coat of shellac (after a 48 hour wait between coats). Step down the grits from 200, 320, 400.
Did you use the amber shellac right out of the can? Or, did you cut it at all?
Drag a light coat of stain over it thats a shade or two darker to hide the variation in the splotches. Don’t spend weeks if your life sitting on the floor fighting it.
Will anything be sitting in front of this section? And how bad does it really look standing back from it? I agree with Cody, maybe try a little darker stain to even it out. Otherwise, too much time, move on.
Forget the shellac. Yes, it was used a hundred years ago but new finishes are far superior for appearance and durability. My guess is that it was not sanded down enough . You have to make sure all the stripper is completely removed. Any remnants of stripper will seal the wood in that area and leave the blotches. No one likes sanding, but it is the single most important step in getting a good finish.
Tung oil will take several coats and takes a long time to dry between coats. The first coat will soak up and be rough. Sand after it is dry- 1-2 days. ( 220 grit) Second coat will create a dull finish. Let dry, sand (220 or higher grit) and apply successive coats. Each coat will add to the sheen. You can stop when you get the sheen you desire- from dull to gloss. The positive of using Tung oil is that it can be touched up if damage occurs. The down side is that it is a long and laborious process. It is typically used on restoring furniture. _ small projects with small areas to cover.
Question: Do you have access to an air compressor? If you do, then spraying would be a much better way to go. Since you have an entire house to do it would be a wise investment to purchase spraying equipment. Then you can spray finishes- such as lacquer (which is the standard in the cabinet industry) conversion varnishes, a host of water based finishes and even paint. Modern technology is a wonderful thing- you should use it. The end product will be superior to your shellac finish and be much easier to apply and look better in the end.
You could try a darker shade of shellac (buttonlac or garnet lac?) dragged over the lighter boards/blotchy areas to blend . I don’t think you can buy pre-mixed buttonlac or garnet-lac shellac in a can but it is very easy to mix it yourself from flakes or buttons and alchohol. If you decide to use stain I would suggest aniline dye stain (Behlen/Mohawk Solar-lux NGR wood dye) because unlike pigment based stain, it retains a transparent color feel that does not obscure the grain and seems to match It is also closer to the dye stains used in the latter part of the 19th century with shellac finishes.
It is likely that the old portion was stained before shellacking and old shellac darkens. If you want to match that color you will need to add color. I have said before that I use the pure pigment available in a tube of artist’s oil paint, burnt umber, to darken woods.
After you feel that have taken the finish completely off, but not yet sanded. Put a dab of burnt umber on a paper towel that has some paint thinner on it and wipe it on. You will immediately, while it is still wet, see what it will look like when it has enough coats of finish on it to get your desired sheen. All places that still have finish on them, will not absorb stain, and need to be removed will be obvious.
If you see no flaws, you know that you are ready to stain and finish. I usually use 120 followed by 220, and 320 grits on wood that has previously been finished. The finer the final sandpaper used is, the better the grain looks. Each grit needs to remove the fine scratches of the grit before. Any scratches from a lower grit must be removed or it will show in the finished surface. This takes a long time to get right.
Hi Ross, this is just my humble opinion, but from the photo, it doesn’t look too terrible, and speaks to the age and “weathering” of the wood over time from exposure to the light in the kitchen (hence behind the radiator being pristine). If I recall from your revised plan, won’t a fair portion of the walls be hidden by stove, and sink drain board? Embrace the grand old lady’s character – you’d be a little splotchy after 120+ years too. . As I said, just an opinion. Love all that you do on the house.
I tend to agree with you Katie. Ross does impeccable work on the house but I think time is of the essence now.
I second that. And it’s not so splotchy that it will be immediately noticeable when you’re staring directly eye level with it 🙂
My graandmother used to say, “When you don’t know what to do, do nothing….and wait!” 🙂
When you remove the paint, use lots n lots n lots of steel wool n rags with acetone….denatured alcohol isn’t strong enough…NEVER! sand…once you sand, you remove the patina and there is no going backkk..
Before
After
Wow, Jason! The Before/After is stunning!
I’ve done this before. Lose the sandpaper. It will open the grain unevenly. I used steel wool and alcohol for the final “stripping”, let it dry and then went over it with orange shellac. (Yes, Orange. Same as Amber. Originally called Orange Shellac and then marketing got a hold of it and renamed it to Amber). One thing you might be facing that I didn’t, is the overpainting layers. If the shellac was partly/mostly gone before painting, the grain would have absorbed it differently. In which case, back to the sandpaper and sand the hell out of it until you’re down to raw wood! 🙂