
Searching for Elusive Finishes
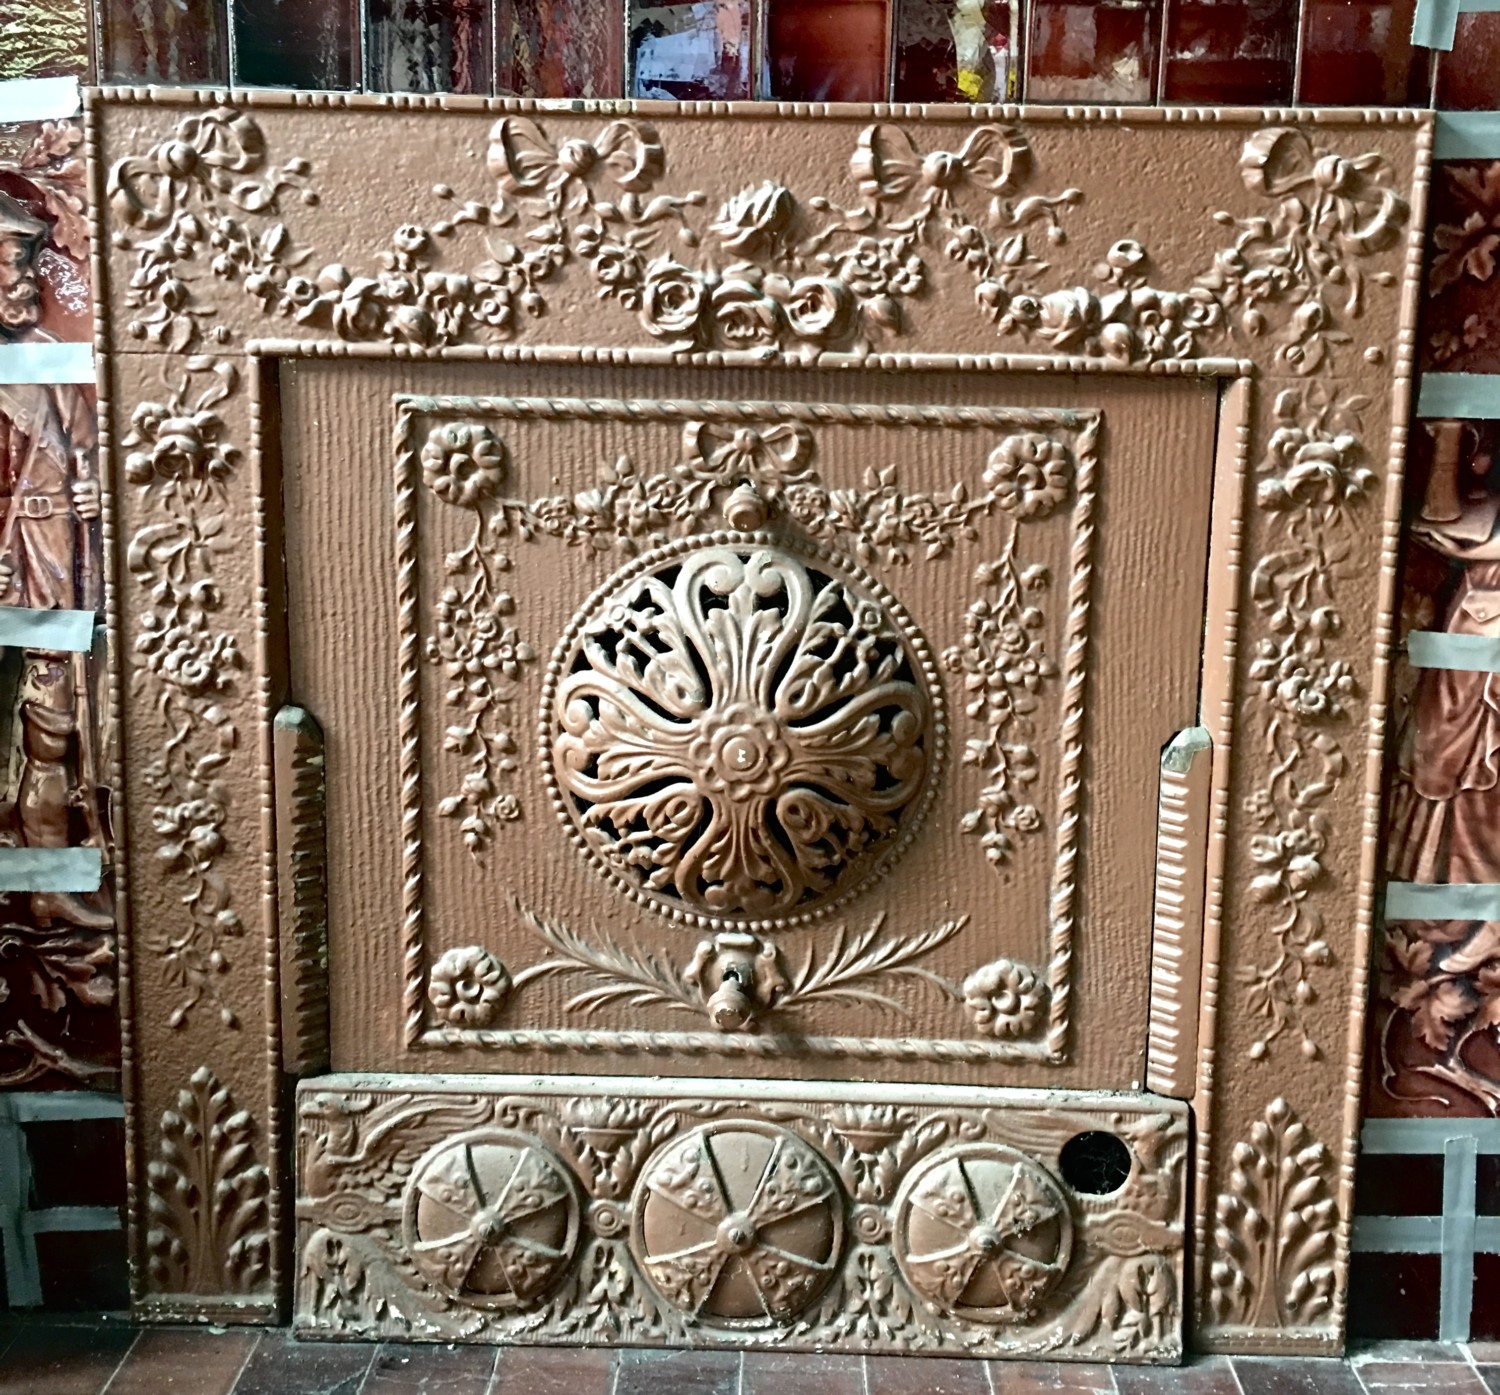
My previous post was on the eight fireplaces in the 1894 Cross House. All were for coal, and the openings had cast-iron frames with insert panels. All of them are heavily overpainted. What, I wondered, was under all that paint?

Good ol’ Bo provided a link to some info about the subject. What captured my special attention was this. So, my frames/inserts were plated? Well, that made sense. Paint would just bubble off the first time a fire was lighted.
Even though I have now owned the Cross House for 2-1/2-years, and never gave much thought to the cast-iron frames/inserts, all of a sudden I was breathless to find out what was under the paint! So, I glopped paint stripper on one corner. WHAT was hiding under????????

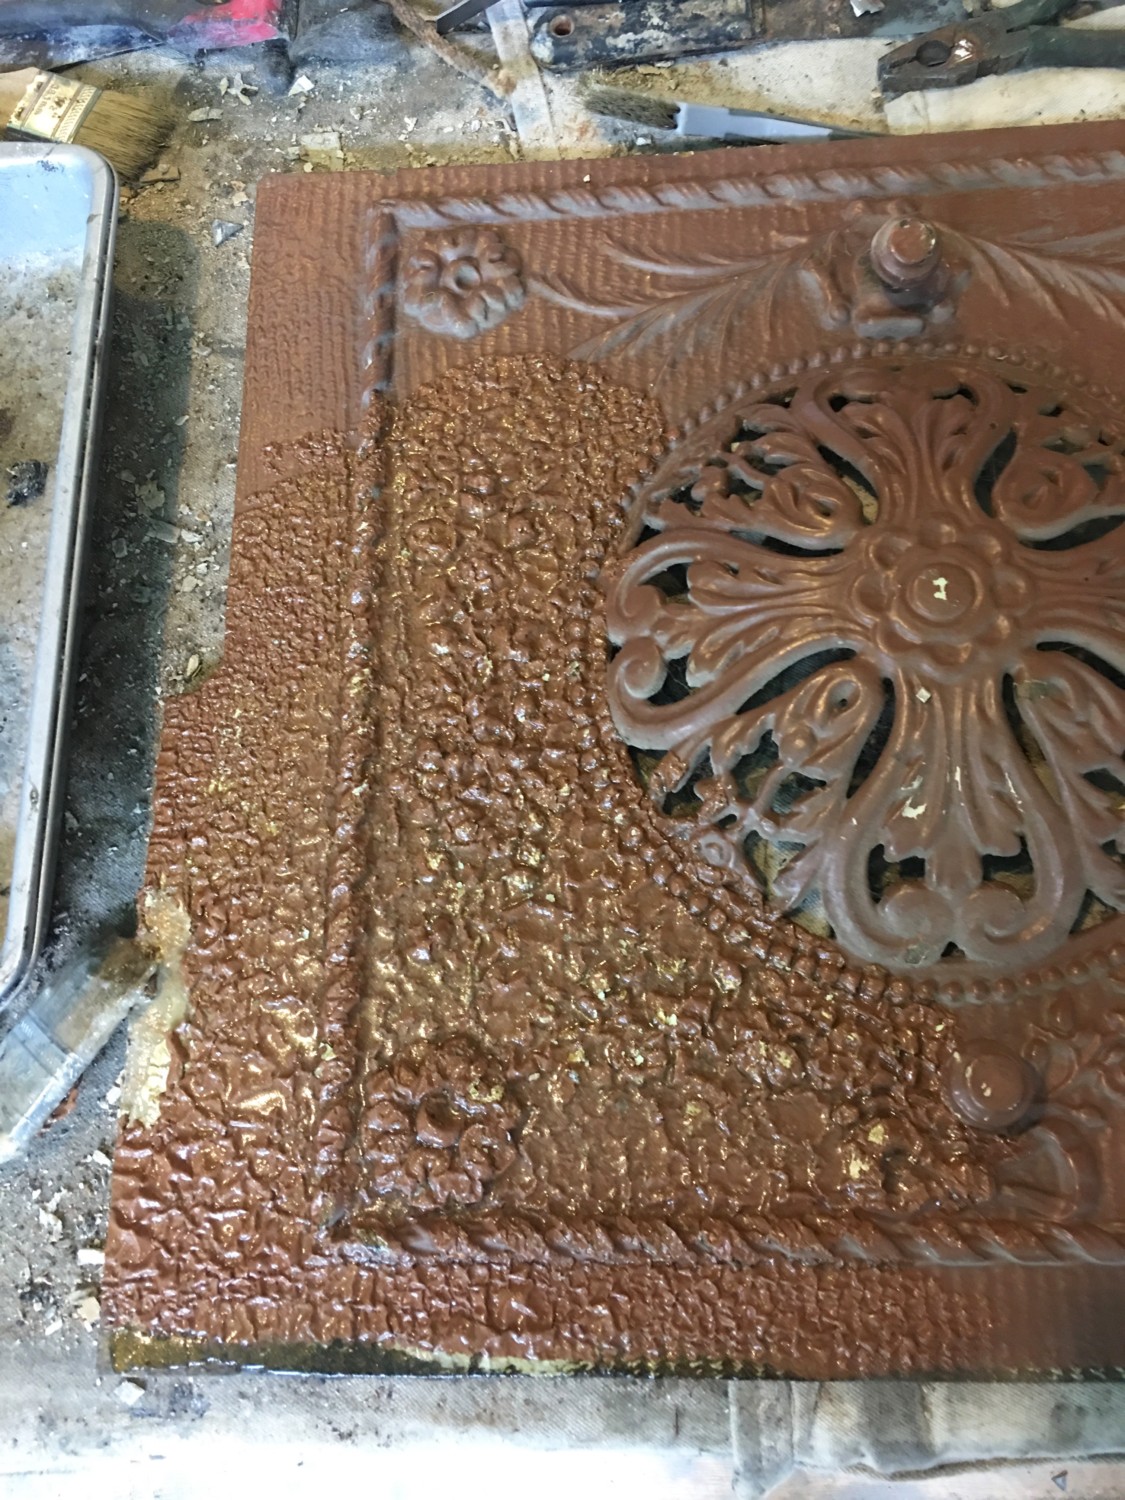
Oh. Under the brown paint was white paint.
And under that was…huh?…what?….HUH?…cast-iron. WHERE was my expected brass plating???????? WHERE? WHERE? WHERE?
Under the white paint was, as I looked closely in the crevices, gold paint. Oh. So the original finish was gold paint rather than brass plating? Oh. Poo.

When I tuned the insert over, I was surprised to see drips from the brown, white, and gold paint jobs. But if the gold was the original finish, surely there would not be drips on the back, right? I mean, the gold finish would have been applied at the factory in a professional, non-drippy manner. But…but…under the gold was just cast-iron. No plating. This suggested that the gold, however inelegantly applied, WAS the original finish.
I glopped paint stripper on the rest of the insert, and then went to paint more on the Great North Wall. While painting, the insert kept swimming around my brain. No, it made NO sense that the original finish was friggin’ gold paint. Paint! Again, my mind kept repeating: Paint would just bubble off the first time a fire was lighted. It would!
This was all quite vexing.
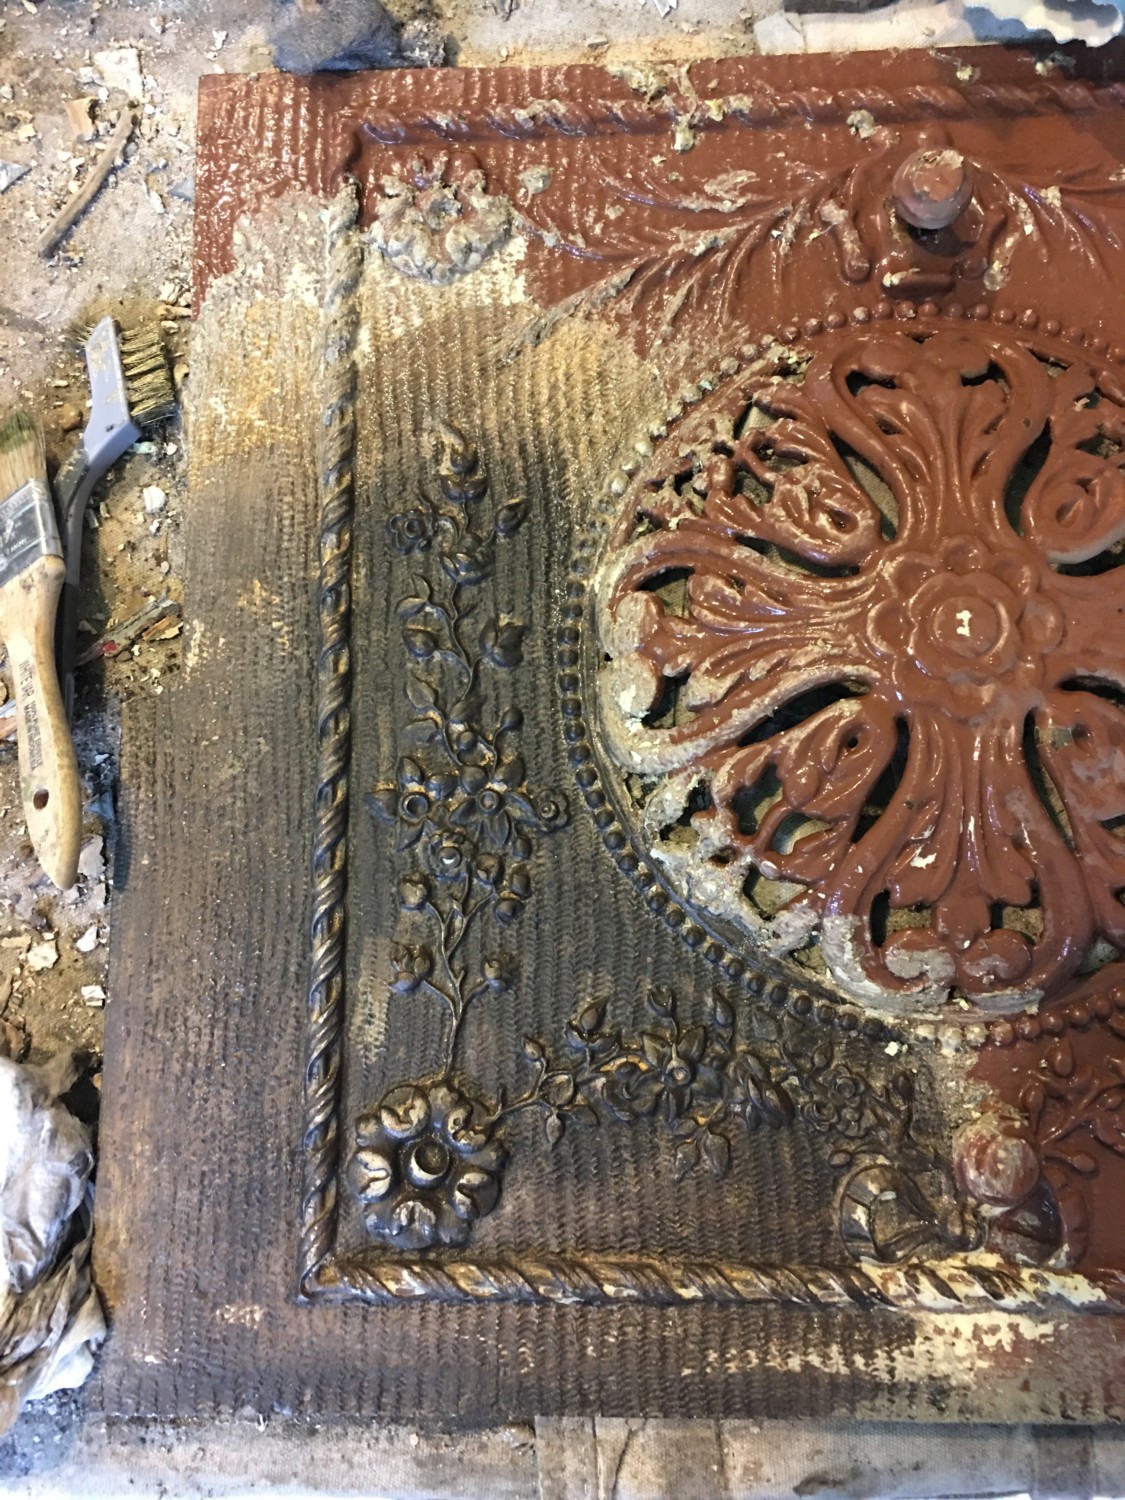
I finished painting, and returned to the damn vexing insert. I washed off all the stripper, and scoured the whole with a brass wire brush (I love love love those small brass wire brushes!).
As I finished cleaning, something startling was revealed. Startling! AND FABULOUS!!!!!!!!
I WAS FREAKING OUT!
Scroll way down…

At the top was — drum roll, please — copper-plating!!!!!!!! ZOUNDS!!!!!!!! COPPER!!!!!!!! It was obvious what happened. Over the years, the heat from the coal fire had burned off the copper-plating near the lower 2/3 of the insert, the area closest to the fire.

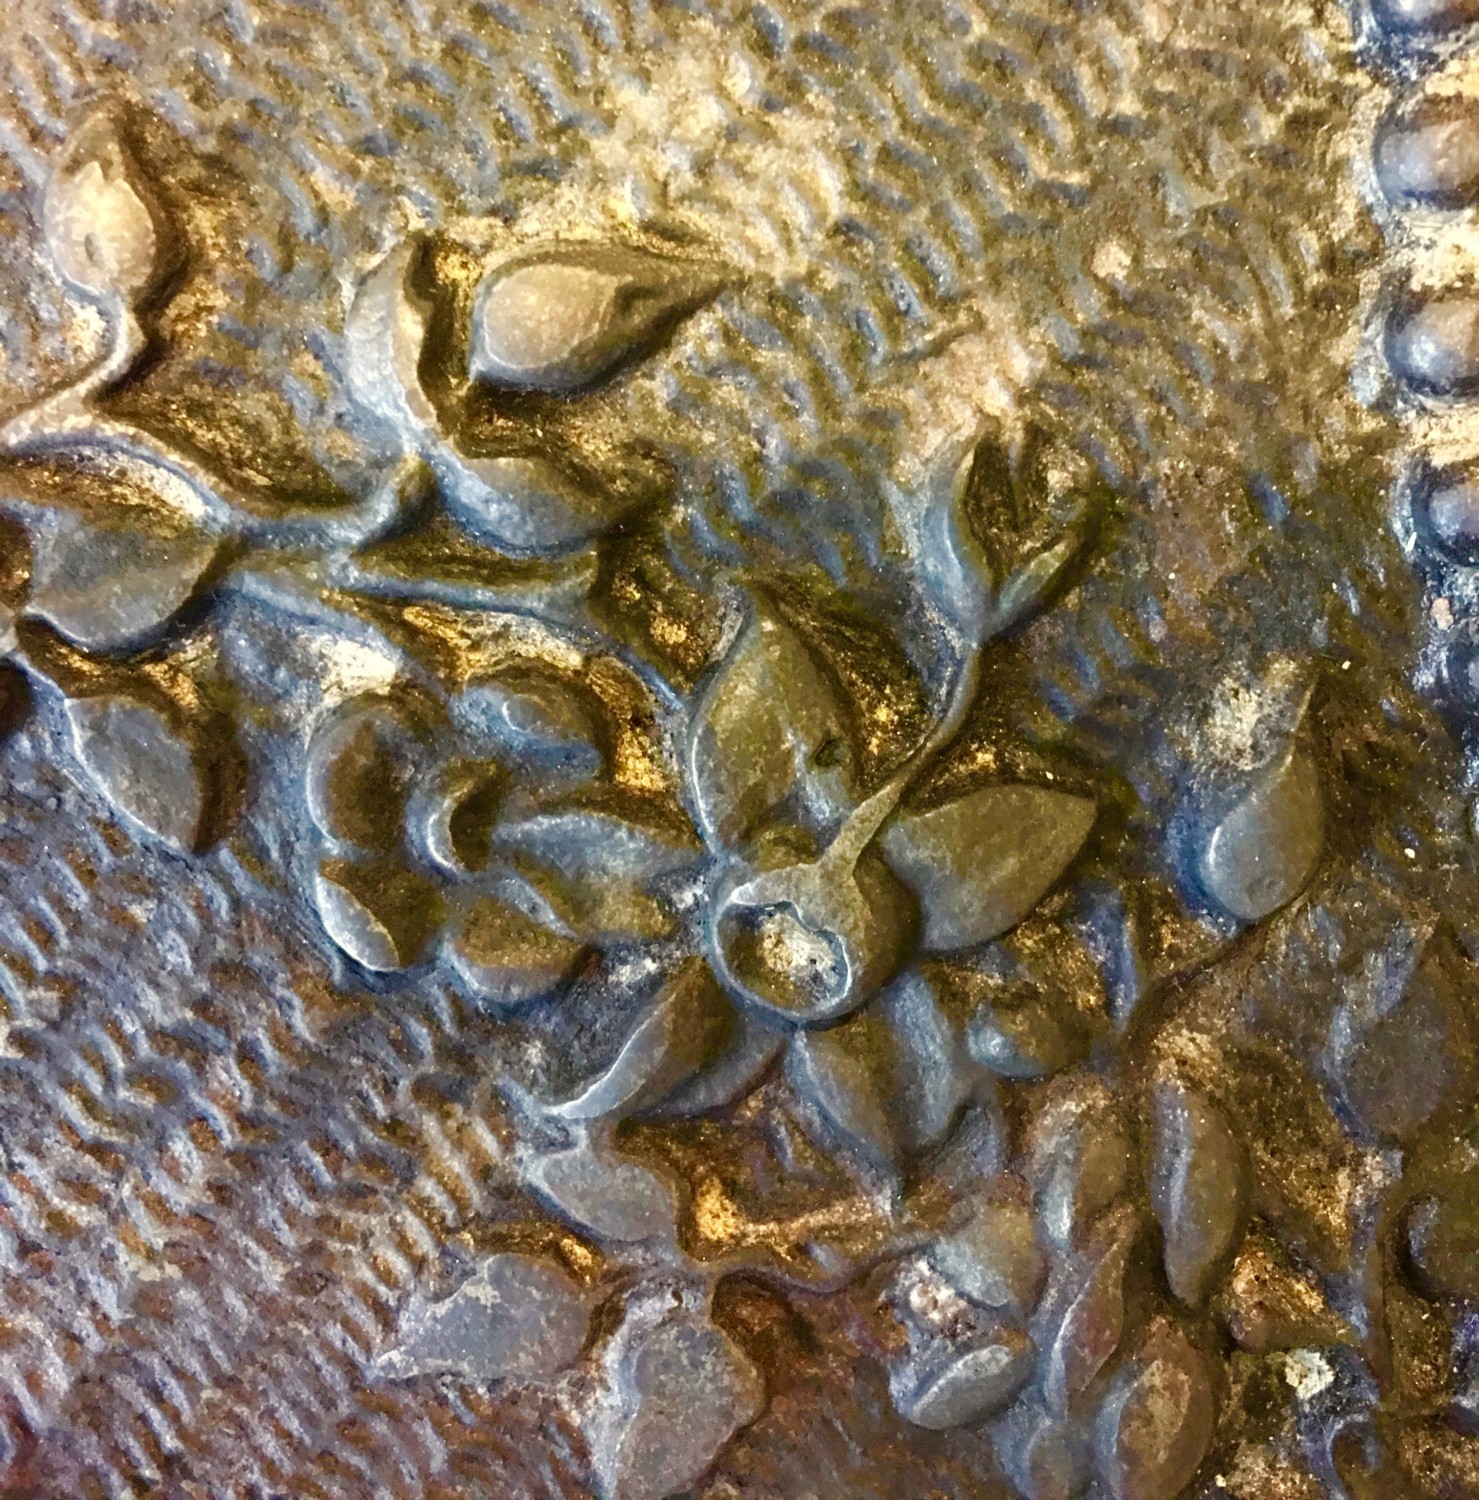
COPPER-PLATE!!!!!!!! Well, now I had had had to find out if the copper-plating was extant on the frame!

It was! Sorta. In the corner the copper is extant. As you move to the center, the heat from the fires burned off the plating and cast-iron is again revealed (click image to enlarge). Poo.
OMG! This was all so exciting!
I have sent an inquiry to a plating company. Can they recreate the original finish? I mean, there is no way I could just spray-paint the frame/insert copper. No way, man!
Stay tuned!

30 Comments
Leave a Comment
Your email address will NEVER be made public or shared, and you may use a screen name if you wish.
The cast iron frame for my fireplace cover is snapped in two. Can this be welded for repair?
I thought that then sand blasting it and doing a brass powder coat could work.
I intend on eventually replacing the fireplace with a gas insert and use the cover during the summer months.
Image here.
What do you think?
Thanks!
THAT is your dining room? It’s stunning! I wanna see MORE of your house!
Alas, I cannot advise how to repair your frame. Out of my element!
Can anybody else help regarding Blair’s plea?
Practically speaking, cast iron can’t really be welded. Experts are sometimes able to braze cast iron parts, but the craftsperson must be highly skilled. If your part has to take heat after joining, your options are pretty limited. If not, you may be able to make some sort of reinforced repair using JB Weld. http://www.jbweld.com/
Good luck!
Yes Blair, cast iron can be welded. Will the repair be invisible? Nope. But it can be reasonably innocuous. I use several stoves on a regular basis which have all had successful welded repairs. Do some research and find someone who is sufficiently skilled to do such work… there are people like that still out there. Here is a link to one business which restores cast iron stoves: http://www.millcreekantiques.com/restoration.html
Here are the rest of my photos. We just closed on the house and are doing a good top to bottom cleaning before we move our furniture in. Also, we are able to assess all the little repairs that will otherwise get buried and forgotten once the furniture is arranged!
WOW! Stunning! But I wanna see the outside, too!!!!!
LOVE the sink inside the closet!
LOVE the finished butler’s room off an unfinished attic!
LOVE the built-in seating around the LR fireplace!
Sadness, as the built in seats are MISSING!
Here are the realtors listing photos, some are of the outside. Note the bathroom!
Blair, the bird corner on your ceiling paper was a design produced by M.H. Birge & Sons of Buffalo as Corner No. 193 in 1885. A sample of it was found in the Brillion Collection and reproduced by Victorian Collectibles (now out of business).
Click here to see the Brillion original, and two images of the bird corner as it was originally published in the Birge catalog for 1885 as part of a complete ceiling design.
A similar Birge corner can be seen here.
[From Ross: How amazing, Bo! Thanks for posting this! I love love love these kind of discoveries!]
TO DIE FOR!
I love the closet sink, and the Mamie pink sink that found its way into the basement.
Your house is AMAZING!!! Would love to see a blog or read about some history of the house!
We are cleaning it top to bottom until we move our furniture in.
We are surrounded by hundreds of beautiful, turn of the century homes.
Here is a link to my historic neighborhood photos on facebook, here https://www.facebook.com/Harriskemperneighborhood/photos/a.434548839914342.89658.434360416599851/572480606121164/?type=3&theater
And here- https://www.facebook.com/photo.php?fbid=2266094182372&set=g.308148986956&type=1&theater
It is good to keep in mind that copper alone was rarely used by itself as a finish, but was most frequently the base for a much more “artful” and sophisticated treatment that involved patina and selective relief, typically referred to as “antique copper” or “oxidized copper” – often with the distinctive striped effects that are commonly (and incorrectly” called Japanned copper or tiger stripe copper. In fact, it was a cheap way to imitate more expensive antiqued bronze finishes, so wasn’t even really meant to evoke copper as much as a red bronze.
Take a look at this set of metal finishes from the Russell & Erwin (hardware) Manufacturing Company around the turn of the century.
No copper finishes that don’t have further processes done on them. The idea was to appear rich and aged, not shiny and new (unless shiny and new was intended to imitate polished gold or silver).
Copper plates readily to steel and cast iron, and typically acts as the first layer onto which nickel is then plated, then chrome onto nickel. So a little rubbing on these old oxidized finishes, combined with the regular wear and tear of aging in use, usually reveals a copper finish – but it is not the “original” finish, only the base plating for the original finish.
I would presume that the original grates and covers looked a lot like the best-preserved examples of your Yale & Towne hardware – a dark patina with limited subtle highlighting of raised areas to (subtly) bring out the relief.
Bo! I love you! Thanks for the wealth of advice!
The plating company I use has always done really good work. I am hoping that the extant plating is enough for them to create a matching finish.
Check out the finish on the fireplace accessories in the 1892-94 Heurich House in D.C.; here.
This one is gilt but has the oxidized copper in the fireback.
An 1892-4 house in Portland. And here.
Just to prove that I can be both right and wrong at the same time (and am not afraid to admit it), here is the finish selection page from that 1907 Drake Grates & Fireplaces catalog on Internet Archive:
Not that B.C. – Bright Copper – is a finish that is offered. But it is also not recommended to stand “climate or heat.”
When confronted with options like this, one is best served by considering the evidence in the context of the larger setting… would bright copper seem to harmonize with the stained woodwork, tile, and other wall and hardware finishes? In general, if the facts aren’t clear like in this case, I’d go with an authentic finish that best suits the environment and doesn’t call undue attention to itself as “restored” – my two cents would be a rich antique or oxidized copper. 😉
My plan (subject to change!) was to see if I can get the extant finish copied.
It does not look like BRIGHT copper, but rather rich antique. My plater can do that.
One more comment on bright copper. Bright copper had its heyday during the first half of the 1880s during the peak of the Aesthetic Movement when Japanese-inspired mixed metal treatments were considered the peak of sophistication – and even then the copper wasn’t always bright so much as “natural”…
See here.
By the 1890s, tastes had moved on. There was some revival of bright copper in hand-hammered English Arts & Crafts metalwork (like W.A.S. Benson) around the turn of the century, but this is pretty unrelated to iron fireplace frames.
Just one more comment, which I assume you are already well aware of – there is no reason that the fireplace frames in every room had to be the same. Decorating each room in its own style and wood species and finishes was pretty much standard operating procedure for houses of your caliber. I’d follow the lead of the surviving hardware finishes in each room – if they are the same, then the fireplaces probably were too. But, for instance, the oxidized copper would not have harmonized well with that fireplace with the blue and white tile I’d think…
[From Ross: I agree. My plan was to strip each one over a period of time and see what is revealed! Certainly the “blue” room would be next! My curiously is running wild!]
The fireplaces were used at the Cross house.
Yes! I saw that, too! I have to do more exploring now!
while those vertical posts are fascinating I would like to be able to read them so that following posts make sense
Hi Ross. Loved the article on the mantels. In the UK we do not have the summer or winter covers, so seeing your version is a revelation. I attach a link to a product which I used when restoring cast iron fireplaces in my own Edwardian property. They come in a variety of shades and with a protective coating can withstand heat so might be of use.
Colin
Colin, I wonder how Treasure Gold compares to Rub n’Buff, which we use over here in a similar way?
Bo, I am waiting for a quote from the plater to recreate the original copper-plate, with an antique finish.
If I can’t afford it, my plan was to use Rub n’Buff.
Modern Masters might be an option as well, as it can I believe be antiqued and/or patinaed fairly well.
Hi all. Oh, I like the look of the Rub n Buff line. The shades are more subtle than the UK versions. Time for an online order methinks! Thanks Bo for that link.
https://deringhall.com/browse/accessories-fireplace-elements
Ebanista: a resource for one of a kind interior designers and architects…
The Queen Anne Victorian style
when, where, why, who, and how: http://www.wentworthstudio.com/historic-styles/queen-anne/