
Returning to the I’ll-Do-It-Later
When I began painting the exterior of the Cross House in the spring of 2014, I “overlooked” certain aspects which needed more work than I could focus on at the time.
I’ll do it later.
One aspect was small pieces of trim above the column capitals. ALL of these needed attention. Some were missing. None were properly attached after 123-years.
But…at the time…I just painted them with the idea that I would revisit them…at some point.
It seems however that some point has become now.
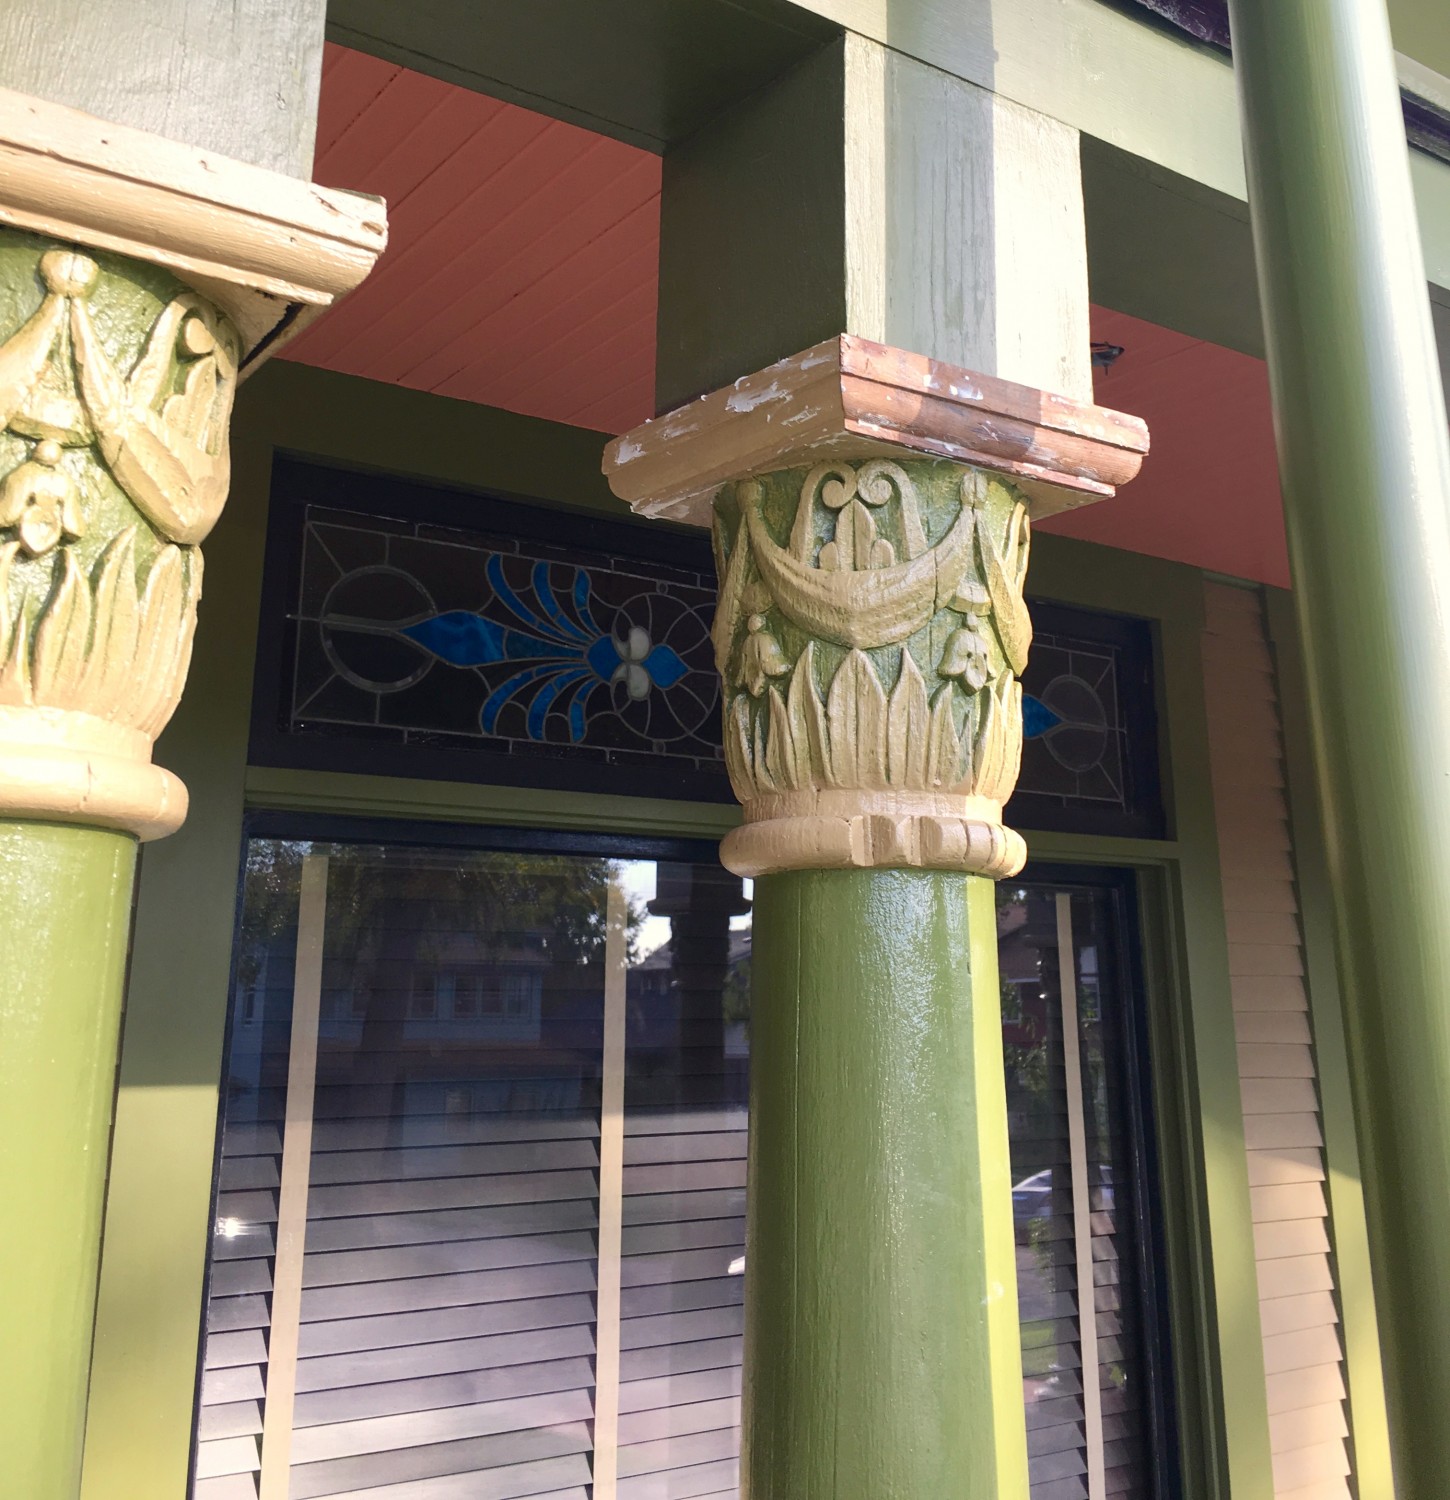
On the main porch, one capital (right) was missing a piece of its top trim. I added this today. I have no idea of how to repair the damaged bullnose at the bottom of the capital. I am not even sure I care. I know! Gasp! Oh, on the capital to the left, you can see how poorly fitted the top trim pieces are. Repairing them is a job for tomorrow!
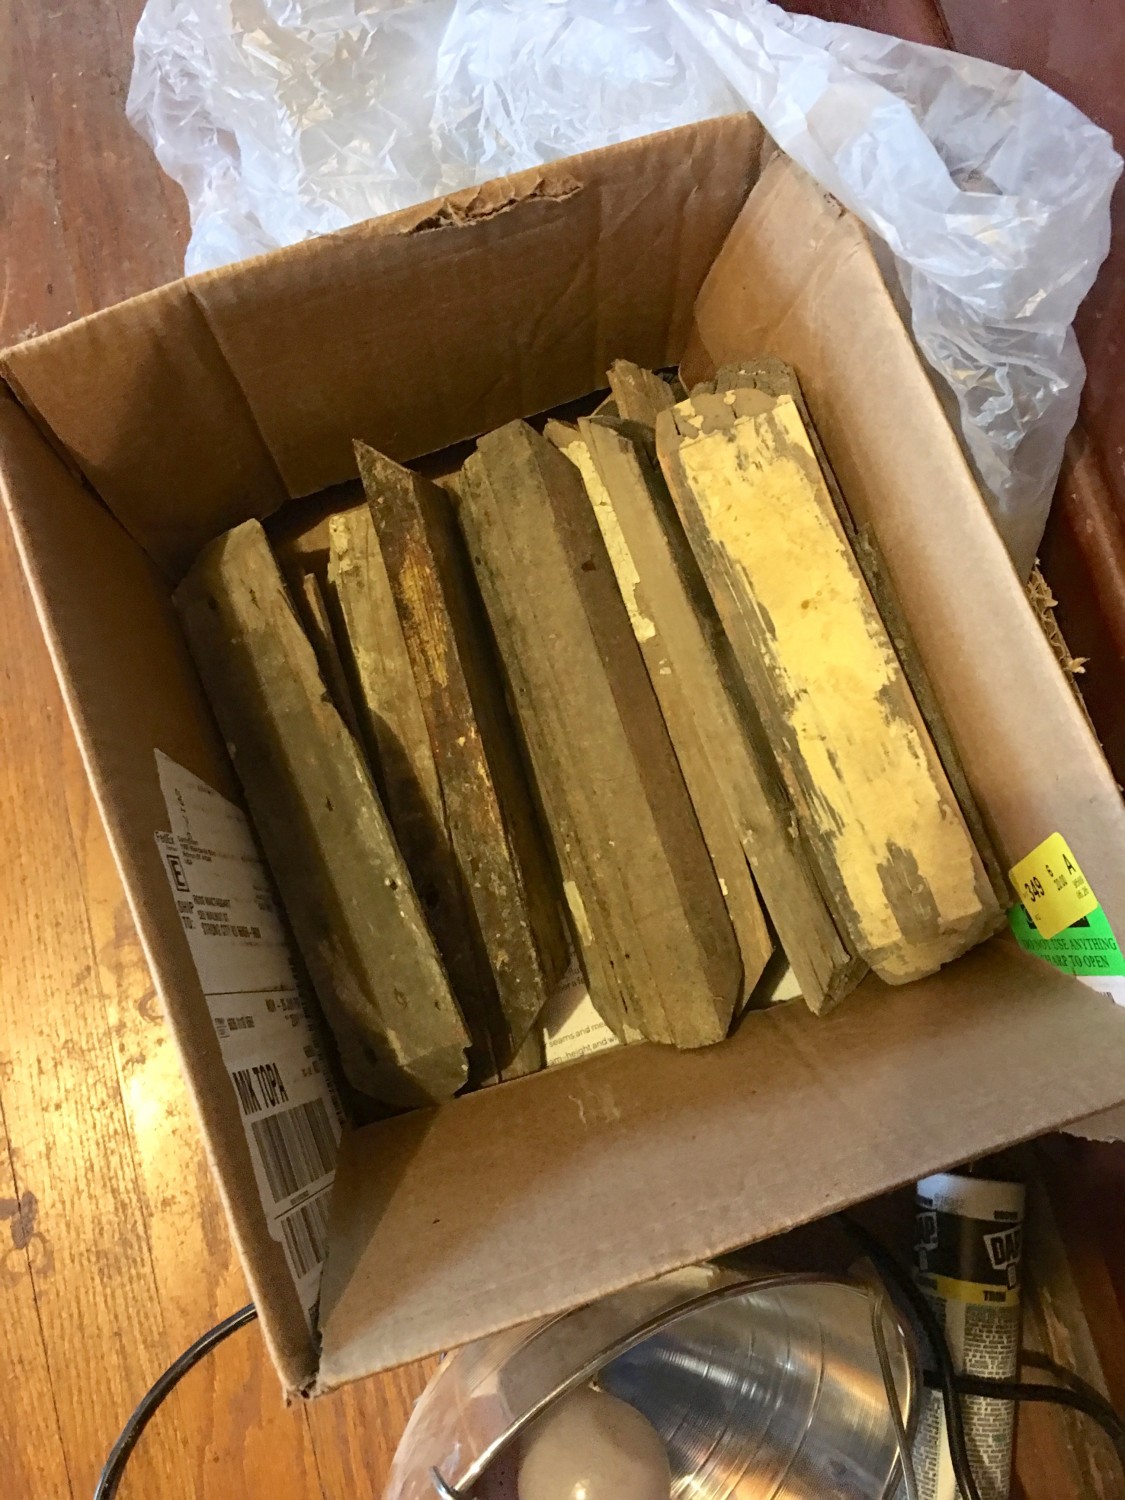
Bits of capital trim have fallen off during the decades and I found a dozen or so in the basement Aladdin’s Cave. I am slowly finding where each piece went and reinstalling them. I get absurdly excited when a match is made.
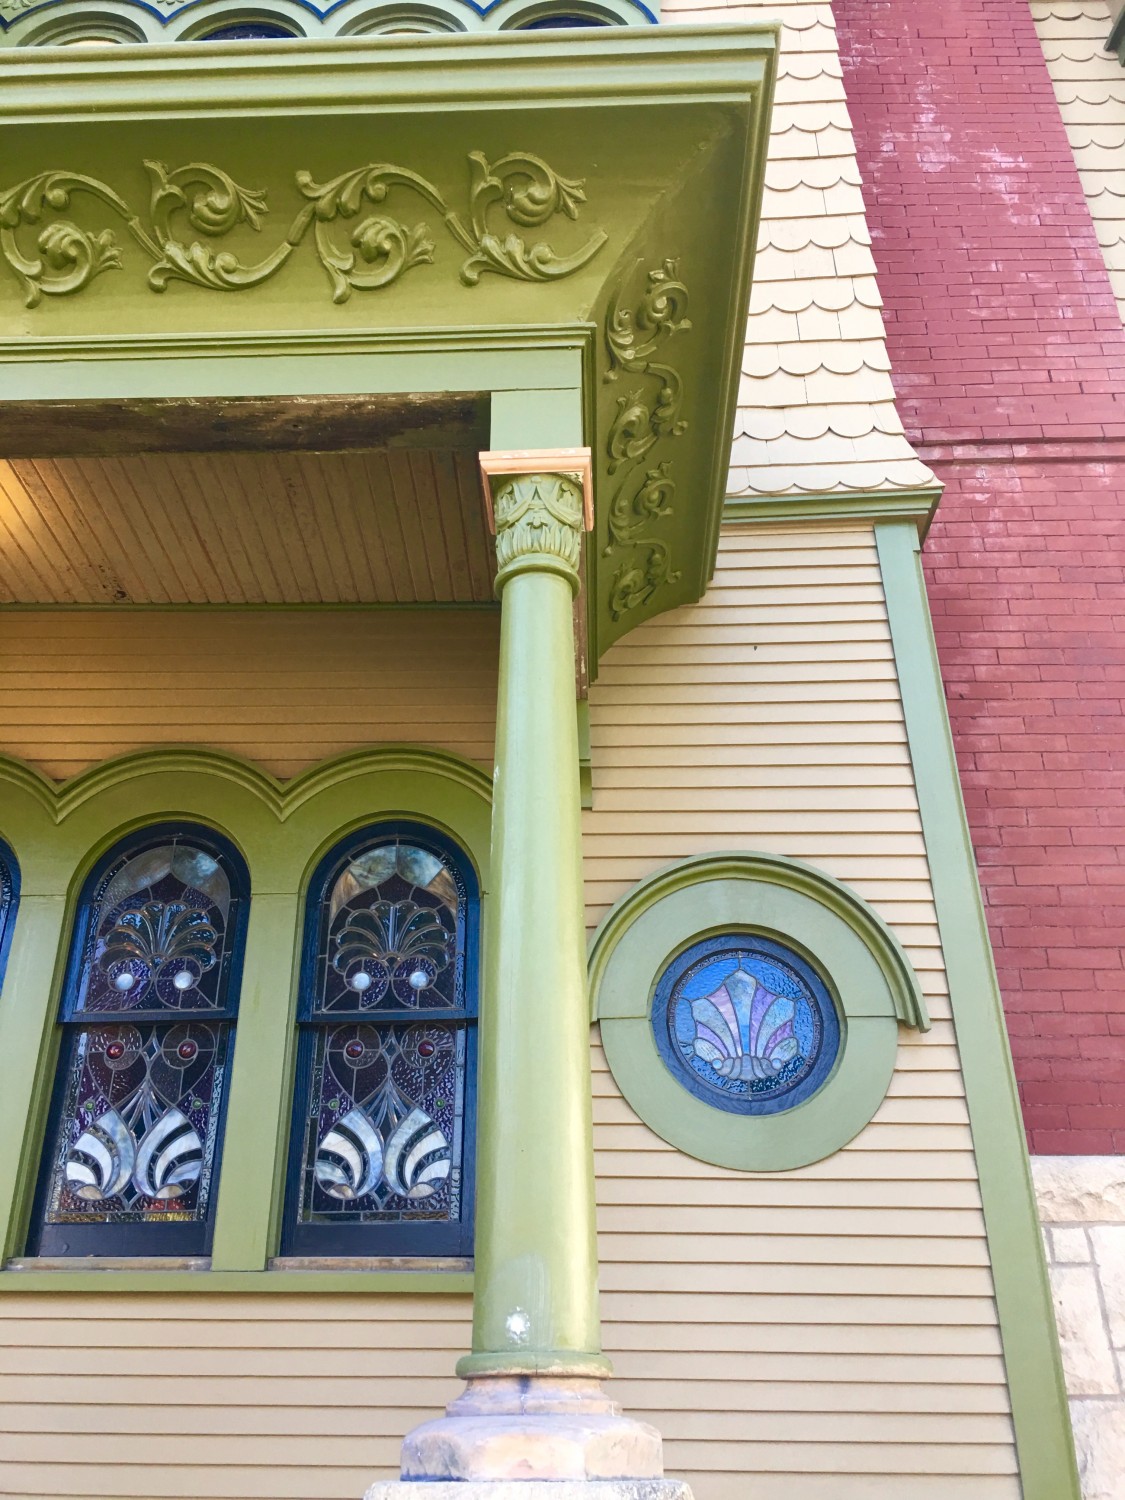
On the north porch there is but a solitary column. I could not find its missing capital trim anywhere so, two years ago, had new trim milled to match the original. Today I installed the trim!!!!!!!!
There are a zillion huge projects with the Cross House but occasionally taking the time to do small projects is really satisfying. It is also such a relief to return to I’ll-do-it-later projects and, you know, do them!

12 Comments
Leave a Reply Cancel Reply
Your email address will NEVER be made public or shared, and you may use a screen name if you wish.
Lovely! The lone north porch column now has it’s capital trim – the world is suddenly a little less ugly.
Wonderful! Im certainly not bothered by the damaged bullnose trim, it still fulfils its visual role, and on such an old house, such battle scars are to be expected, and I find it quite interesting.
Hi Ross! long-time reader, but this is the first time I’ve felt compelled to comment. For repairing the notches in the bull-nose, here is this wonderful product out there.
I’ve used it on my own Victorian columns (and other places on my old heap of a farm house) with brilliant results. It’s easy to use and shape (both before it sets, and to sand afterward) and would be perfect for filling in those notches on your column if you decide you care.
I had solid wood columns that had rotting out bottoms (“helped” along by some very inappropriate application of caulk 10 years ago by so called professionals..). After cleaning out the parts that had effectively turned back into soil, I used the Liquid Wood product to solidify the somewhat spongy wood that remained, and then WoodEpox to rebuild the missing parts. The repair is undetectable and the bases of my columns are structurally sound again.
Cheers!
Beth
Ross, do those trim pieces need to be flashed? I would think at least the three sides that are exposed to rain should be flashed. What say ye?
The tops of the trim pieces should slant slightly down and away from the capital so water doesn’t sit on it. If not that way already, sanding with coarse sandpaper wrapped around a wood block, and angling the block down should do the trick.
–
My first thought was to say, “if you are going to flash it, do it soon, before it gets too cold. Make sure that no one is looking when you open your trench coat, and flash away.”
The tops, even if they have a slight pitch, will remain wet on top and the paint bond will be broken, leading to rot.
The tops do have a slight pitch. And none have rotted in 123-years, which is amazing! I am also caulking the tops.
The one bright spot of having a zillion things to do is that you can skip around and work on what you’re in the mood to work on. That must make the whole process more fun and I can tell that you love working on the house. At the end of the day, that’s what it’s all about!
I love reading everyone’s take on progress & the delight we enjoy over your victories over the small projects. Echoing Kerri & the joy over choosing the moment when in the mood for returnng to the intracies of artisanal restoration. The attention to detail is why we love the blog & why we love you Ross with your quips, foibles, comic relief & ecstasy over the finished results! You are such a joy! I frequently laugh out loud at your antics and priceless reactions. Such a wit!
The north porch & adjacent stained glass windows are so beautiful & glorious!
guess what? jb weld makes nifty wood epoxy putty that comes in a stick. knead it in your hands for a few minutes, fill the cavities in the bull nose, let it set, and sand it to shape. boom done.
It is the details that really make the composition look great. You’re a journeyman at that, of course 😉 It also continues to amaze me that previous owners saved pieces like that. Previous owners of the houses we’ve had didn’t even save doors when they removed them.
Do you caulk or seal the joint at the top to inhibit water getting behind the trim?
For the missing and cracked pieces of astragal on the columns, I would probably use a two-part epoxy. I used a lot of it on our last wood house (mostly repairing rotted-but-salvagable) window sashes, and it held up very well, I used the system from Rot Doctor with the epoxy consolident followed by the epoxy paste. It is very sticky stuff and challenging to mold to profiled shapes, since it sticks to your putty knife or other tools as tenaciously as the wood. What I found best for situations that required shaping, was to apply plenty with the knife, then put a sheet of saran wrap over it, and mold it by hand, or with other smoothing tools through the wrap. After it’s cured, the plastic will peel off, and you can sand to the final shape.
We sold that house when we moved this summer, but the stuff I’d first done 5 years earlier was still as intact as when I finished it.